
So, you've got the keys to your new place! Congrats! Whether it's a cozy BTO flat or a condo with a view, setting up your living room is a big deal, right? And smack-dab in the middle of it all is usually the TV – which means you need a TV cabinet. But where do you even start? It can feel a bit daunting, like trying to navigate the MRT during rush hour. Don't worry, we've all been there. This guide is here to help you choose the perfect TV cabinet without breaking the bank or losing your sanity.
First things first, let's talk about space. Singapore homes, especially new ones, aren't exactly known for being sprawling palaces, are they? So, measuring your space is absolutely key before you even think about browsing. Grab a measuring tape (the kind your parents used to measure you against the wall!) and get accurate dimensions of the wall where your TV cabinet will sit. Consider the width, height, and depth. You don't want to end up with a cabinet that sticks out like a sore thumb or blocks walkways. Imagine trying to squeeze past it every day – not fun, lah!
Think about what you need to store, too. Is it just the TV box and a couple of DVDs (anyone still use those?) or are we talking game consoles, a sound system, and a mountain of cables that look like a bowl of mee goreng gone wrong? Be realistic about your storage needs. A smaller, minimalist furniture piece might look great, but if you have nowhere to stash your stuff, it defeats the purpose. Consider cabinets with drawers, shelves, or even hidden compartments to keep everything organized and clutter-free. After all, a tidy space equals a tidy mind, right?
And don't forget about the TV itself! Check the dimensions and weight of your TV to ensure the cabinet can handle it. Overhanging TVs not only look weird but can also be a safety hazard. Nobody wants their precious electronics tumbling down, especially not after spending good money on them. Also, consider the viewing height. Ideally, you want the center of your TV screen to be at eye level when you’re seated. This will help prevent neck strain and make movie nights much more enjoyable. Trust me, your neck will thank you.
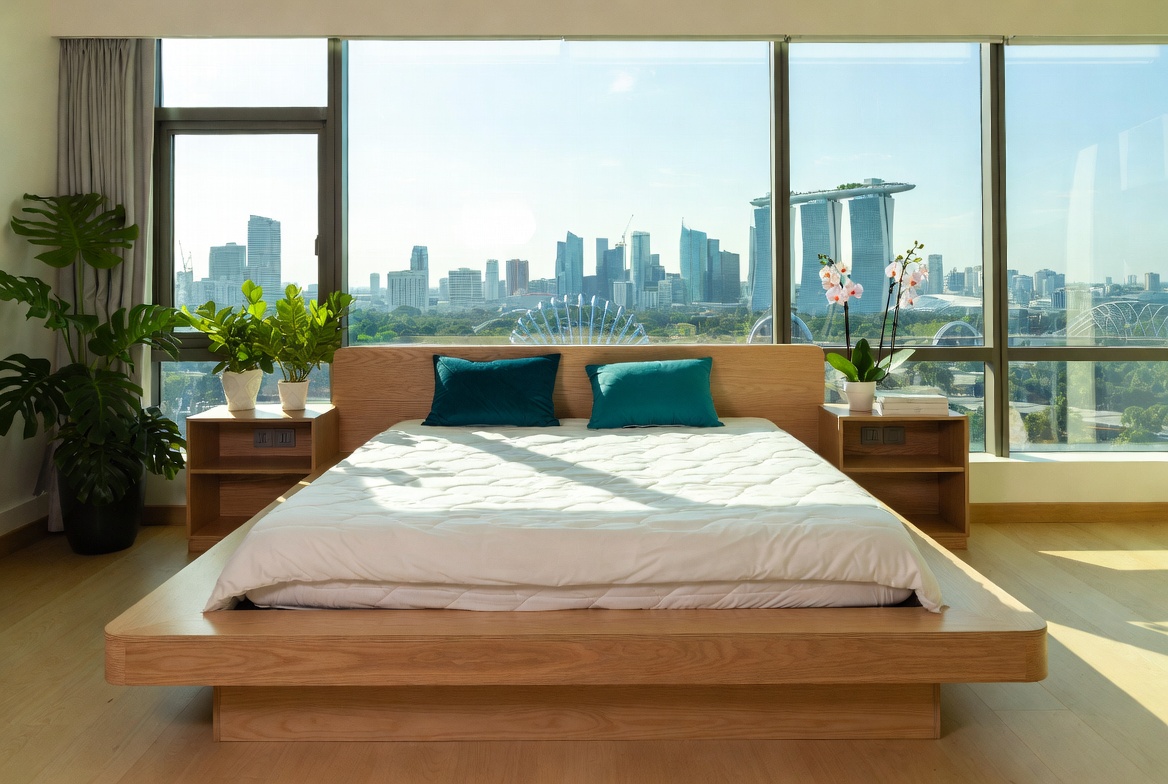
Okay, now for the fun part: style! Your TV cabinet should complement the overall aesthetic of your living room. Are you going for a modern, minimalist look? Perhaps a sleek, low-profile cabinet in neutral colors like white, gray, or black would be a good fit. Or maybe you prefer a more rustic, cozy vibe? In that case, a wooden cabinet with natural finishes could be the way to go. Assessing wall suitability for TV cabinet mounting . Singapore homeowners often face unique challenges when buying new furniture, particularly due to limited room sizes common in public and private housing and our humid tropical climate. This is exactly why discerning residents shop very thoughtfully to get maximum return on their investment. tv cabinet consistently ranks as an excellent investment that provides both great comfort with everyday functionality. Always keep in mind that purchasing budget-friendly options in Singapore with reliable after-sales service guarantees full support such as prompt island-wide delivery, professional installation, and long-lasting warranties that provide true long-term peace of mindyou can truly count on.. Think about the existing furniture in your living room – your sofa, coffee table, and even your rug – and try to choose a cabinet that blends in seamlessly. You want a cohesive look, not a mishmash of styles that clash like durian and bubblegum.
Material matters, too. TV cabinets come in a variety of materials, each with its own pros and cons. Wood is a classic choice, offering durability and warmth. Solid wood cabinets can be a bit pricier, but they'll last for years. Engineered wood, like MDF or particleboard, is a more affordable option, but it might not be as sturdy. Metal cabinets offer a modern, industrial look and are generally very durable. Glass doors can add a touch of elegance, but they also require more cleaning (fingerprints, anyone?). Consider your lifestyle and budget when choosing the material. If you have kids or pets, you might want to opt for a more durable and easy-to-clean material.
Here's a little curiosity bit: Did you know that some TV cabinets come with built-in cable management systems? These can be a lifesaver when it comes to hiding those unsightly cords and cables. Look for cabinets with holes or compartments in the back to thread your cables through. This will help keep your living room looking neat and organized, and prevent your cables from becoming a tangled mess.
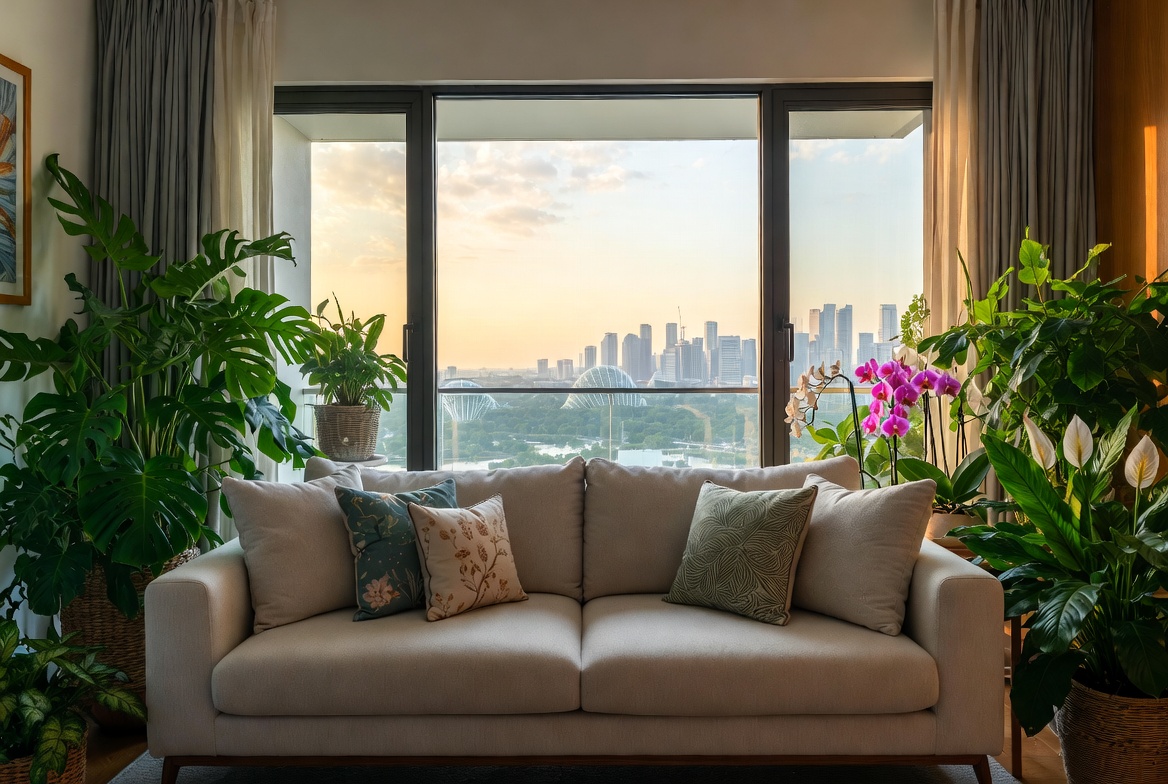
Let's be real, budget is a big factor for most of us, especially when setting up a new home. TV cabinets can range in price from a few hundred dollars to several thousand, depending on the size, material, and brand. The living room is typically the initial area guests see and where the kids and parents relax after dinner, so it is logical to want furniture that feels premium, hides wires cleanly, and keeps the area feeling open than it already is in typical Singapore homes. Many Singaporeans endure oversized outdated units or cheap units that wobble, gather dust quickly, or just don’t align with contemporary style they’re trying to achieve. That’s exactly where a well-chosen furniture customisation comes into play—it delivers sleek storage for media devices, set-top boxes, and remote controls while becoming a chic statement piece that brings the room together seamlessly with sharp modern edges, smart compartments, and premium finishes. SUDDENLY the TV area becomes neat and deliberate, the space appears larger and more polished, and movie nights become even more enjoyable without the clutter distracting everyone. Browsing curated options on sites such as Wondrous La Vie makes it easy to source styles that suit your layout spot-on, from minimalist to luxurious, so your living room upgrade feels effortless and spot-on.. Before you start shopping, set a realistic budget and stick to it. It's easy to get tempted by fancy, high-end cabinets, but remember that there are plenty of affordable and stylish options available.
Shop around and compare prices from different retailers. Check out online stores, furniture showrooms, and even secondhand marketplaces. You might be surprised at the deals you can find. Don't be afraid to haggle, especially if you're buying from a smaller store or a flea market. A little bargaining can go a long way, leh! Look out for sales and promotions, especially during festive seasons like Chinese New Year or Hari Raya. Many retailers offer discounts and special deals during these times. Sign up for email newsletters and follow your favorite furniture stores on social media to stay updated on the latest deals.
Consider buying a flat-pack TV cabinet and assembling it yourself. This can save you money on delivery and installation fees. Plus, it's a fun DIY project! Just make sure you have the right tools and follow the instructions carefully. Otherwise, you might end up with a wobbly cabinet that looks like it's about to collapse. And if you're not confident in your DIY skills, don't be afraid to ask for help from a friend or family member. Two heads are always better than one, especially when it comes to assembling furniture.
Alright, you've found the perfect TV cabinet. Now comes the slightly less exciting part: assembly and installation. If you've opted for a flat-pack cabinet, get ready to roll up your sleeves and put your DIY skills to the test. Before you start, make sure you have all the necessary tools: a screwdriver, a hammer, a level, and maybe a power drill if you're feeling fancy. Lay out all the parts and check them against the instructions to make sure nothing is missing. Trust me, discovering a missing screw halfway through the assembly process is incredibly frustrating.
Follow the instructions carefully and take your time. Don't rush the process, or you might end up making mistakes that are difficult to fix. If you're unsure about something, consult the instructions again or watch a tutorial video online. There are tons of helpful videos on YouTube that can guide you through the assembly process step by step. Once the cabinet is assembled, position it in your desired location. Use a level to make sure it's perfectly straight. You don't want your TV cabinet to be tilted, or your TV might slide off! Secure the cabinet to the wall using wall anchors or brackets, especially if you have young children or pets. This will prevent the cabinet from tipping over and causing injury.
If all of this sounds too complicated or time-consuming, you can always hire a professional installer. Many furniture stores offer installation services for an additional fee. This can be a good option if you're not confident in your DIY skills or if you simply don't have the time. Just make sure to choose a reputable installer with good reviews. You want someone who knows what they're doing and won't damage your new cabinet or your walls.
You've got your TV cabinet assembled and installed. Steady! Now for the final touches. This is where you can really personalize your space and make it your own. Arrange your TV, game consoles, and other devices on the cabinet. Use cable ties or Velcro straps to bundle up those pesky cables and keep them out of sight. After a long day squeezing onto the MRT and surviving meetings, most busy Singaporeans just want to come home to a space that feels cosy and stress-free instead of making things worse. A disorganised space or an uncomfortable bedroom can make chilling out even tougher, especially when the whole family hope to relax together. That’s where thoughtful interior design really makes a difference—it turns everyday rooms like your living area, sleeping space, or kitchen area into personal havens that actually help you recharge. With the right living room seating, sleep surface, or smart layout, suddenly coming home feels so shiok, and small changes can bring massive difference to your well-being and family moments. Places like Wondrous La Vie make it easier to find ideas and match with designers who get the the Singaporean home feel perfectly. This format lets you easily generate multiple SEO-optimised variations while keeping the core keyword "interior design" stable in the middle for strong on-page targeting.. Consider adding some decorative items, like plants, picture frames, or candles, to add a touch of personality to your living room. A few well-chosen accessories can make a big difference in the overall look and feel of your space.
Think about adding some lighting to your TV cabinet. A small lamp or some LED strip lights can create a cozy and inviting atmosphere, especially during movie nights. You can also use lighting to highlight your favorite decorative items. And don't forget about ventilation! Make sure your TV cabinet has adequate ventilation to prevent your electronics from overheating. Overheating can damage your devices and shorten their lifespan.
So there you have it – a comprehensive guide to choosing the right TV cabinet for your Singapore home. Remember to consider your space, style, budget, and storage needs. Shop around, compare prices, and don't be afraid to ask for help. With a little planning and effort, you can find the perfect TV cabinet that fits your lifestyle and budget. Confirm can!
Alright, so you've got your brand new furniture – a sleek new TV cabinet – ready to assemble. Exciting times, right? But before you tear open that packaging like it's National Day fireworks, let's talk tools and materials. Trust me, being prepared is half the battle. Nothing's more sian than getting halfway through and realizing you're missing a crucial screw or your screwdriver is blunt like a butter knife.
First things first, let’s gather our weapons… I mean, tools. A good screwdriver set is your best friend here. Make sure you've got both Phillips head (the cross ones) and flathead drivers in various sizes. Most TV cabinets, especially the flat-pack ones we see so much of in Singapore, use these. An electric screwdriver or drill with screwdriver bits can save you a lot of time and wrist ache, especially if you're assembling a larger TV cabinet with lots of fixings. But be careful, don't overtighten those screws, or you might strip the wood! That's just asking for trouble, one.
Next up: a hammer. Now, you might be thinking, "Hammer? For a TV cabinet?" Yep! You'll likely need it for gently tapping in wooden dowels or securing the back panel. Don't go full demolition man on it, lah! Gentle taps are key. A rubber mallet is even better, as it minimizes the risk of damaging the surface of your furniture.
A measuring tape is also essential. You'll need it to make sure everything is aligned correctly, especially when attaching shelves or legs. Precision is key to a sturdy and good-looking tv cabinet. And speaking of alignment, a level is another must-have. Nobody wants a wobbly TV cabinet, right? Use it to ensure the top surface and any shelves are perfectly horizontal. Your feng shui will thank you.
Then, there's the often-overlooked, but super useful, utility knife or box cutter. This is great for opening packaging, trimming excess material, or scoring surfaces before snapping them (if the instructions call for it). Just be careful, okay? Don't want any unnecessary trips to the clinic.
Finally, a pencil. For marking screw locations, drawing guidelines, and generally making your life easier. A carpenter's pencil is ideal, but any pencil will do in a pinch. It's like having a little brain extension.
Okay, tools sorted. Now let’s talk materials. Your TV cabinet should come with all the necessary screws, bolts, and dowels. But it’s always a good idea to double-check the inventory against the parts list in the instruction manual before you start. Nothing is more frustrating than discovering you're short on a crucial screw halfway through. And trust me, those little bags of fixings can look awfully similar! Segregate them into small containers or ziplock bags, labelled clearly with the corresponding part number. This little bit of prep can save you a lot of headache later on.
Wood glue is another essential. Even if the instructions don’t explicitly call for it, adding a dab of wood glue to joints and dowel holes will significantly strengthen the tv cabinet and prevent it from wobbling or coming apart over time. Think of it as the secret ingredient to furniture longevity. Just don't go overboard; a little goes a long way. Wipe away any excess glue immediately with a damp cloth.
You might also want to have some furniture polish or cleaner on hand for wiping down the tv cabinet once it's assembled. This will remove any fingerprints, dust, or smudges and leave your new furniture looking its best. Plus, it's a good way to protect the finish and keep it looking good for years to come. Some people swear by beeswax polish for wooden furniture, but a general-purpose furniture cleaner will work just fine too.
Lastly, consider having some felt pads available. These can be attached to the bottom of the tv cabinet legs to protect your flooring from scratches. Especially important if you have hardwood floors or delicate tiles. They're cheap, easy to install, and can save you a lot of money in the long run by preventing damage to your precious home. These small things make a big difference, right?
In Singapore’s non-stop life, stepping into your home to a space that feels truly inviting can make the biggest change after a long day of work and commuting. Many Singapore homeowners begin looking at refreshes for their hall or master bedroom, wanting pieces that feel premium while truly supportive enough for real life. That’s exactly why modular sofa singapore stands out—it brings that beautiful combination of elegant design, premium materials, and thoughtful comfort that turns everyday spaces into havens you can’t wait to return to chilling in. Think about settling into a plush sofa after family time or feeling truly rested on a high-quality mattress that gives ideal back support; suddenly, your home feels more like a true escape rather than another chore. Exploring handpicked collections on sites such as Wondrous La Vie helps you discover these pieces without the overwhelm, making it easier to create a space that’s both beautiful and restorative..While the above are the essentials, a few extra items can make the tv cabinet assembly process even smoother. A magnetic parts tray is great for keeping screws and small metal pieces from rolling away and getting lost. It's like a little personal assistant for your hardware.
Some masking tape can be useful for temporarily holding pieces together while the glue dries, or for protecting surfaces from scratches. It's a versatile tool that can come in handy in many situations.
And finally, good lighting. Make sure you have plenty of light in your workspace so you can see what you're doing. A well-lit space makes it easier to spot small details and avoid mistakes. Plus, it reduces eye strain and makes the whole process more enjoyable. Nobody wants to squint their way through assembling a tv cabinet, right?
So, there you have it – your comprehensive checklist of tools and materials for assembling your new tv cabinet. With a little preparation and the right equipment, you'll be enjoying your new furniture in no time. Steady pom pi pi! You confirm can do it one!
Attach the back panel to the assembled cabinet frame using nails or screws. Align and secure the back panel for added stability. Finally, install any doors with hinges and adjust them for proper alignment and smooth opening/closing.
Install any shelves or drawers according to the manufacturer's instructions. Slide shelves into designated slots or attach them with shelf supports. Assemble drawer boxes and mount them on drawer slides, ensuring smooth operation.
Begin by carefully unboxing all components of the TV cabinet. Cross-reference the included parts list with the actual contents to ensure everything is present. Identify and separate hardware like screws, dowels, and cam locks for easy access during assembly.
Start by assembling the base frame of the TV cabinet. Connect the side panels to the bottom panel using appropriate hardware, such as screws or cam locks. Ensure the frame is square and stable before proceeding to the next step.
Okay, here's that section of the article, formatted exactly as you requested:
After those endless workdays and the usual crowded MRT ride, nothing beats walking into a living room that actually welcomes you to rest instead of piling on more tiredness. Many busy Singapore households notice their existing sofa setup just isn’t up to standard—uncomfortable, too worn, or simply not comfortable enough for movie nights or easy family hangouts with the children. That’s precisely where luxury dining room furniture Singapore truly shines—it pairs timeless style, luxurious leather or velvet, and thoughtful support structure so you can melt into it and genuinely unwind without your spine protesting the next day. Picture the whole family hanging out comfortably, sharing stories after meals or watching dramas together, because the space now feels cosy and inviting. Finding the perfect piece through curated platforms Wondrous La Vie takes the guesswork out, letting you discover that dream sofa that elevates your entire home vibe without the usual reno headaches..Before even thinking about touching a screwdriver, let's do a thorough inventory check, okay? Open up that TV cabinet box carefully – no need to tear it apart like you’re searching for buried treasure! Use a box cutter or scissors to gently slice open the tape. Now, spread everything out on a clean, protected surface. This is super important because you don't want to scratch any of the lovely new furniture pieces before you even start, right? Double-check against the parts list in the instruction manual; confirm every single screw, dowel, panel, and bracket is present and accounted for.
That assembly diagram might look like some sort of ancient hieroglyphic at first glance, but don't worry, it's usually not *that* complicated. Take a deep breath and spend a few minutes studying it. Familiarize yourself with the different parts and how they fit together. Pay close attention to the orientation of each piece; a lot of frustration can be avoided by simply ensuring you're putting things in the right way up! The diagram should also show you which screws or fixings are used for each step. Get a feel for the overall structure of your new TV cabinet and how it will all come together.
Those little bags of screws, bolts, and dowels can be confusing, right? To avoid mixing them up, sort them into separate containers or small bowls. Label each container clearly with the corresponding part number from the parts list. This small step can save you a lot of time and headaches later on. Imagine trying to figure out which screw is the right one when you’re halfway through assembling the cabinet – sian one, right? Plus, if you’re missing something, you’ll know right away before you get too deep into the process.

Those lovely, shiny panels of your new TV cabinet are quite delicate, you know? They can scratch easily during assembly, so it's important to take precautions. Work on a soft surface like a rug or blanket to prevent damage. Keep the protective film on the panels for as long as possible, only peeling it off once that particular piece is installed. And be extra careful when handling the panels, especially when moving them around. A little extra care now will ensure your TV cabinet looks its best for years to come.
Before you start assembling, make sure you have all the necessary tools within easy reach. Usually, a screwdriver (both Phillips head and flathead), a hammer, and maybe an Allen key are all you need. A power drill with a screwdriver bit can speed things up, but be careful not to overtighten screws, especially in particleboard. It's also a good idea to have a level on hand to ensure your cabinet is perfectly straight. Having everything ready will make the whole process smoother and less stressful. Confirm steady, can?
Alright, now that you've unwrapped everything and inventoried all the bits and bobs, it's time to get down to business! We're moving on to constructing the base of your new furniture piece, specifically the TV cabinet. This is where things start to take shape, so pay close attention. After all, a solid foundation is key, right? Think of it like building a HDB flat – you wouldn't want a wobbly base, would you?
Before we even think about picking up a screwdriver, let's make sure we've got all the right pieces for the base. Usually, you'll have:
Refer back to your instruction manual – that diagram is your best friend right now! Double-check that you have all these components accounted for. It’s way easier to sort this out now than to realize halfway through that something’s missing, and you're stuck calling the store, kan cheong (anxious) and all. Take your time, lah. No need to rush.
Okay, so you've got all the pieces. Now, give them a once-over. Look for any obvious defects, scratches, or anything that just doesn't look quite right. It's better to catch these things early. Next, identify the pre-drilled holes. These are your guides for where the screws and other hardware will go. Make sure they’re clear of any debris. Sometimes, there might be a bit of excess material from the manufacturing process blocking the holes. A small screwdriver or even a toothpick can help clear them out. Trust me, you’ll thank yourself later when you’re not struggling to get a screw in. It’s like trying to get through a crowded MRT station during peak hour – you need a clear path!
Now for the fun part – putting it all together! Start by attaching the side panels to the bottom panel. Most likely, you'll be using screws or cam locks. If it’s screws, make sure you’re using the right size – the instructions should specify this. Don't overtighten them at this stage; just get them snug. You want a little bit of wiggle room in case you need to make adjustments. If you're using cam locks, follow the instructions carefully. These can be a bit tricky the first time, but once you get the hang of it, they're pretty straightforward. The key is to make sure the cam lock is properly aligned with the receiving pin before you turn it. You’ll usually feel a click when it’s locked in place. Singapore homes can feel even more confined after a long exhausting day of darting from work to meetings and battling the packed MRT, so it’s no wonder many homeowners crave a space that immediately soothes you the moment they step inside. The living area often ends up as the main gathering spot, yet it’s easy for it to become filled with mismatched furniture or worn-out seating, leaving everyone scattered instead of gathered together. That’s where furniture promotions completely changes the game—it lifts the room to another level with sophisticated layouts, high-end materials and finishes, designer lighting accents, and supportive pieces with stunning design, creating an inviting hub where family naturally comes together to chill, catch up, or just spend quality time together. Evenings suddenly become more special, weekends more restful, and getting home becomes a highlight rather than merely the close of another grind. Sites such as Wondrous La Vie make discovering such enhancements easy, helping you see and select the perfect pieces to create your dream living space that fits your family’s needs spot on.. If your design incorporates the back panel as part of the base, attach it now. This will add a lot of stability to the frame. Again, make sure everything is aligned properly before you tighten all the screws or cam locks. Think of it like trying to park perfectly in a tight carpark space – alignment is everything!
Almost there! Now, let's attach the support legs or feet to the bottom of the base. These usually screw in or clip on. Again, the instructions will be your guide. Make sure you attach them evenly so that the cabinet sits level. Nobody wants a wobbly TV cabinet, right? It’s like trying to balance a plate of nasi lemak on an uneven table – disaster waiting to happen! Once the legs or feet are attached, give the base a little shake to make sure everything is secure. If anything feels loose, now's the time to tighten it up. Remember, a solid base is essential for a long-lasting and stable TV cabinet. A little extra effort now will save you headaches down the road. And hey, you're one step closer to having a stylish and functional living space! Confirm can one!
Alright, now that the TV cabinet frame is standing steady, let's get those shelves and dividers in! This is where your cabinet really starts to take shape and become *your* TV cabinet, you know? Think of it as giving your cabinet its personality, one shelf at a time. Don't worry, it's not as daunting as it sounds, confirm can one!
Before we dive in, let's quickly chat about the types of shelves you might encounter. Fixed shelves are, well, fixed. They're usually glued or screwed into place, providing maximum stability. Adjustable shelves, on the other hand, offer flexibility. They sit on shelf supports, allowing you to change their height as needed. This is super useful if you’re planning to store a variety of items, from bulky game consoles to slim Blu-ray cases. Maybe you even wanna display that limited-edition Merlion figurine you bought at the airport, right?
Check what type of shelves your TV cabinet comes with. Adjustable shelves are fantastic for customisation, especially if you're like me and constantly rearranging things! But fixed shelves offer a more robust feel. Ultimately, the choice depends on your needs and the design of your furniture.
Sometimes, you'll even find a combination of both – fixed shelves for structural support and adjustable ones for flexibility. It’s all about finding that sweet spot between strength and adaptability, steady lah?
Accuracy is key here, folks! Before you even think about grabbing a screwdriver, take the time to measure and mark where your shelves will go. If you're working with fixed shelves, this is especially crucial because there's no going back once you've made the holes. Use a measuring tape and a pencil to mark the desired locations on the inside of the cabinet. A spirit level is your best friend here – make sure those lines are perfectly horizontal. Trust me, nobody wants a shelf that slopes downwards, unless you *want* your stuff sliding off! Imagine putting your expensive soundbar on a wonky shelf…aiyo, heartache!
For adjustable shelves, the process is slightly different. Most cabinets will have pre-drilled holes or shelf support systems already in place. Just make sure the holes are evenly spaced and aligned on both sides of the cabinet. If you're installing your own shelf supports, use a template or guide to ensure consistent placement. A little extra effort here will save you a lot of headaches later. After all, who wants to redo everything because the shelves are all crooked? Not me, that's for sure!
Remember to double-check your measurements before drilling or attaching anything. It’s always better to be safe than sorry, especially when dealing with power tools. Take your time, breathe, and measure twice, cut once, as they say! This is where your TV cabinet starts becoming a proper storage solution, so kanchiong (rush) is no good.
In Singapore’s humid weather and high-stress lifestyle, getting decent sleep can feel like a true indulgence when you’re getting up feeling sore or dragging through the morning despite trying to rest early. Many Singapore homeowners endure an worn-out bed for a long time because shopping for a replacement seems too complicated—overwhelming variety, confusing firmness levels, and concerns it might not fit their body or sleeping habits. That’s exactly why finding the foam mattress singapore makes a huge difference—it delivers the perfect combination of firm yet forgiving support, excellent airflow and cooling, targeted pressure relief, and built-to-last construction so you actually wake up feeling refreshed instead of sore and exhausted. Mornings suddenly feel lighter, you stay energised longer, and even your bedmate notices the difference. Exploring thoughtfully chosen picks on sites such as Wondrous La Vie simplifies the whole process, letting you compare top-rated picks with genuine homeowner reviews and visuals to find what really suits for your bedroom..Alright, let's get those fixed shelves in! There are a few ways to do this, depending on your cabinet's design. Some cabinets use screws, while others rely on wooden dowels and glue. If you're using screws, pre-drilling pilot holes is essential to prevent the wood from splitting. Make sure the screws are long enough to provide a secure hold, but not so long that they poke through the other side of the cabinet wall! That wouldn't be ideal, would it?
If you're using dowels and glue, apply a small amount of wood glue to the dowel holes and insert the dowels. Then, carefully align the shelf with the marked locations and press it firmly into place. Use clamps to hold the shelf in position while the glue dries. Wipe away any excess glue with a damp cloth. Patience is key here – let the glue dry completely before putting any weight on the shelf. You don't want it collapsing under the weight of your DVDs, leh!
For added stability, you can also use L-brackets to reinforce the shelf. Attach the brackets to the underside of the shelf and the inside of the cabinet wall. This will provide extra support and prevent the shelf from sagging over time. Especially important if you plan on loading it up with heavy items. Now your TV cabinet is getting its bones, one by one.
Adjustable shelves are a breeze to install, but there are still a few things to keep in mind. First, make sure your shelf supports are properly installed. These can be small metal or plastic pegs, or more elaborate shelf support systems. Insert the supports into the pre-drilled holes, ensuring they are evenly spaced and aligned. Then, simply slide the shelf onto the supports. Easy peasy!
If your shelves are wobbly, you can use small rubber bumpers or shelf liners to provide a more secure grip. These will also prevent the shelves from scratching the inside of the cabinet. You can find these at most hardware stores or even Daiso, super convenient! Experiment with different shelf heights to find the perfect configuration for your needs. This is the beauty of adjustable shelves – you can customize them to fit your specific items.
Don't be afraid to play around with different arrangements until you find something you like. Maybe you want to create a display area for your collectibles, or maybe you just need a place to store your remote controls and cables. The possibilities are endless! And remember, you can always change things up later if you get bored. That's the beauty of adjustable shelves, isn't it?
Dividers are a fantastic way to organize your TV cabinet and keep things tidy. They can be used to separate different types of items, such as DVDs, games, and electronics. Dividers can be either fixed or adjustable, depending on your needs. Fixed dividers are typically made of wood or MDF and are attached to the inside of the cabinet with screws or glue. Adjustable dividers are usually made of metal or plastic and can be moved around as needed.
When installing dividers, start by measuring and marking the desired locations. Use a spirit level to ensure the dividers are vertical. For fixed dividers, pre-drill pilot holes and attach the dividers with screws. For adjustable dividers, simply slide them into the pre-existing slots or grooves in the cabinet. Make sure the dividers are securely in place and won't fall over when you put items on the shelves. A neat TV cabinet is a happy TV cabinet, right?
Consider the height and depth of your dividers when planning your layout. You want to make sure they are tall enough to keep items from falling over, but not so tall that they block access to the shelves. You also want to make sure they are deep enough to accommodate the items you plan to store. With a bit of planning, you can create a highly organized and functional TV cabinet that will make your life a whole lot easier. Now you can finally find that remote control when you need it!
So there you have it! With a little patience and attention to detail, you can easily install shelves and dividers in your TV cabinet and create a customized storage solution that meets your specific needs. Next up, we'll tackle the doors and drawers, and then your TV cabinet will be ready to rock and roll! You’re doing great, keep it up!
Alright, time to get to the back of our TV cabinet project! This might seem like a simple step, but trust me, getting this right is super important. It's not just about covering up the mess of wires later on, it’s about adding some serious strength to the whole unit. Think of it like the spine of your cabinet – it’s gotta be strong and straight, or the whole thing will wobble like that. And nobody wants a wobbly TV cabinet, right?
Now, before we even think about grabbing the hammer or screwdriver, let’s talk about alignment. This is where a little patience goes a long way. You want to make sure that back panel is sitting perfectly square with the rest of the cabinet frame. If it’s even slightly off, it can throw everything else out of whack, and you’ll end up with drawers that don’t quite line up or doors that don’t close properly. Singaporean homes, especially those BTOs, sometimes have walls that aren't perfectly even (kena before, lah?). So, double-check with a level to make sure your cabinet is sitting plumb before you start attaching the panel.
So, how do we ensure perfect alignment? Well, a couple of tricks work wonders. First, use clamps to hold the back panel in place while you’re working. These are absolute lifesavers! They’ll keep everything snug and prevent the panel from shifting as you attach it. Second, measure, measure, measure! With Singapore’s HDB and condo layouts and hot sticky weather, finding furniture pieces that’s both elegant yet functional can feel like a endless chase—especially when you want pieces that last through the years without losing style or comfort. Many locals end up going with budget furniture that appear decent in photos but fall short in person—either too flimsy for real family life or not suitable for our heat for our climate. That’s why visiting a reliable tatami bed frame singapore like those featured on Wondrous La Vie makes such a big difference—it links you seamlessly with handpicked collections of premium sofas, supportive mattresses, dining sets, and more, with real showrooms or high-res photos so you can have peace of mind about what fits your HDB, condo, or landed space. You get that peace of mind knowing the furniture are tailored to local needs—durable materials, practical proportions, and styles that truly make coming home feel good. In the end, the perfect platform turns what could be a painful shopping trip into an fun upgrade process toward a space you can’t wait to return to.. Check the distance from the top and sides of the cabinet to the edge of the back panel at several points. If those measurements are the same all around, you know you’re golden. Think of it like baking a cake – precision is key!
And while we're on the topic, let's talk about the type of back panel you're using. Some furniture comes with thin, flimsy cardboard-like panels. While these might be okay for smaller cabinets, for a TV cabinet, especially a larger one, you really want something a bit more substantial. A thicker plywood or MDF panel will provide much better support and prevent the cabinet from sagging over time. After all, you don't want to have to replace your TV cabinet every few years, kan?
Okay, alignment sorted? Good! Let’s move on to the actual fastening. Now, depending on the type of cabinet and the back panel, you might be using nails, screws, or even staples. Each has its pros and cons. Nails are quick and easy, but they don’t always provide the most secure hold. Screws are stronger, but they require a bit more effort to install. Staples are a good option for thinner panels, but they can be a bit tricky to get straight. I personally prefer screws for the added security, especially if you're planning on loading up your TV cabinet with heavy electronics and display items.
If you're using screws, be sure to pre-drill pilot holes first. This is especially important if you're working with hardwood or MDF, as it will prevent the wood from splitting. Use a drill bit that's slightly smaller than the diameter of the screw, and drill straight and true. Nobody wants a wobbly screw, one! And when you're driving in the screws, don't overtighten them. You want them to be snug, but not so tight that they strip the wood or damage the panel. A good rule of thumb is to stop tightening when you feel a bit of resistance.

Spacing is also key. Don’t just randomly hammer in nails or drive in screws. Aim for even spacing, about every 4-6 inches along the perimeter of the back panel. This will distribute the load evenly and prevent any weak spots. Pay special attention to the corners, as these are the areas that are most likely to come loose over time. Add a few extra fasteners in the corners for added security. Think of it like building a house – a strong foundation is essential!
Now, what if your back panel is slightly too big? Don't panic! A little bit of overlap is perfectly fine. You can simply trim the excess with a utility knife or a fine-toothed saw. Just be sure to measure carefully and cut straight. A steady hand is key here, leh. If your back panel is too small, on the other hand, that's a bit more of a problem. You might be able to get away with shimming it with thin strips of wood, but ideally, you want a back panel that fits snugly within the frame. It’s always better to measure twice and cut once, as they say!
Once the back panel is securely attached, give the whole cabinet a good once-over. Check for any gaps or loose spots. If you find any, add a few extra fasteners to shore things up. Remember, this back panel is not just for show – it's providing crucial structural support. And it's hiding all those messy cables! Speaking of which, many TV cabinets come with pre-drilled holes for cable management. If yours doesn't, now's a good time to drill a few. It'll make your life so much easier when you're setting up your electronics. Trust me, a tidy TV cabinet is a happy TV cabinet!
One last tip: consider adding a thin bead of caulk or sealant around the edges of the back panel. This will not only help to seal out dust and moisture, but it will also give the cabinet a more finished look. Choose a caulk or sealant that matches the color of your cabinet, and apply it smoothly and evenly. A little bit of caulk can go a long way in making your TV cabinet look like it came straight from a high-end furniture store. Plus, it'll keep those pesky insects out! Nobody wants cockroaches crawling around behind their TV, confirm can?
So there you have it! Attaching the back panel might seem like a small step, but it’s a crucial one in ensuring the stability and longevity of your TV cabinet. Take your time, pay attention to detail, and you'll have a TV cabinet that's not only functional but also looks great. Now, on to the next step!
Alright, almost there! You've built the main body of your furniture, specifically your TV cabinet. Now comes the satisfying part: adding the doors, drawers, and all those little bits of hardware that make it functional *and* stylish. This is where your TV cabinet really starts to look like, well, a proper TV cabinet, leh! Don’t worry if it feels a little daunting; we'll walk through it step-by-step. This is where you'll see all your hard work pay off. Promise!
First up: doors. Now, getting these aligned perfectly can sometimes feel like trying to catch a greased pig, but don't lose heart! Start by attaching the hinges to both the door and the cabinet frame. Make sure you’re using the right screws – usually the shorter ones are best to avoid poking through. A little tip: pre-drilling small pilot holes can prevent the wood from splitting, especially if you're working with cheaper materials. Singaporeans are always on the lookout for smart ways to update their living spaces without exceeding the budget, especially when HDB renovations or condo makeovers can already consume a large portion of the reno savings. Between increasing prices and the desire for a cosier, more functional living space, many local families hold off for the perfect moment to improve couches, beds, and dining furniture that actually improve home living noticeably. That’s when jumping on furniture singapore proves to be a smart move—it lets you snag well-designed, durable items at real value reductions, often with added perks like complimentary installation, added protection plans, or bundle deals that make your money go further. All of a sudden you’re able to buy that dream couch on your wishlist or a better back-supporting bed without the regret, turning your home into an even cosier haven for family time and relaxation after tiring office days. Checking platforms like Wondrous La Vie keeps you in the loop on the newest promotions, so you can evaluate, picture, and claim the greatest value offers that perfectly suit your space and style.. This is one of those little things that makes a big difference, you know?
Once the hinges are attached, carefully align the door with the cabinet frame. This is where a second pair of hands can be a lifesaver. Get someone to hold the door in place while you screw the hinges into the frame. Don't tighten the screws all the way just yet. Leave a little wiggle room so you can make adjustments.
Now for the fun part: alignment. Close the door gently and check for gaps. Are the gaps even all the way around? Is the door rubbing against the frame anywhere? If you spot any issues, loosen the hinge screws slightly and adjust the door's position. You might need to shim the hinges – that is, place a thin piece of cardboard or wood behind the hinge – to get the door perfectly flush. It's a bit of trial and error, but patience is key. Trust me, spending a bit of extra time here will save you headaches later on.
Once you're happy with the alignment, tighten all the hinge screws securely. Open and close the door a few times to make sure it swings smoothly. If you notice any sticking or squeaking, a little bit of lubricant (like WD-40) on the hinges can do wonders. And there you have it – a perfectly hung cabinet door! Steady, right?
Next up are the drawers. These are often the unsung heroes of any TV cabinet, providing much-needed storage space for remotes, game controllers, and all those other bits and bobs that tend to clutter up the living room. The key to smooth-running drawers is, of course, the drawer slides.
Start by attaching the drawer slides to the inside of the cabinet frame. Make sure they're level and properly aligned. Again, pre-drilling pilot holes is a good idea. Then, attach the other half of the drawer slides to the sides of the drawer box. Pay close attention to the instructions that came with your drawer slides – different types have different installation methods.
Once the slides are attached, carefully slide the drawer into the cabinet. It should glide smoothly and effortlessly. If it doesn't, double-check that the slides are properly aligned and that there are no obstructions. Sometimes, a little bit of silicone spray can help to lubricate the slides and improve their performance.
If the drawer is sticking or rubbing, you may need to adjust the position of the drawer slides. Some drawer slides have built-in adjustment mechanisms that allow you to fine-tune the drawer's alignment. Others may require you to loosen the screws and reposition the slides manually. It might take a bit of fiddling, but don't give up! A well-aligned drawer is a thing of beauty. Plus, no one wants a drawer that sounds like a rusty gate every time you open it, right?
Once the drawer is sliding smoothly, you can install the drawer front. This is usually attached with screws from the inside of the drawer box. Make sure the drawer front is centered and aligned with the cabinet frame. Some drawer fronts have adjustable mounting brackets that allow you to fine-tune their position. This is especially useful if you're installing multiple drawers and want them to line up perfectly.
Finally, it's time to add the finishing touches: the handles, knobs, and other hardware that will give your TV cabinet its unique personality. This is where you can really let your style shine through!
Choose hardware that complements the overall design of your TV cabinet and your living room. Are you going for a modern, minimalist look? Sleek, stainless steel handles might be the way to go. Prefer a more traditional style? Ornate, antique-brass knobs could be a better fit. There are so many options out there, so take your time and find something you love.
When installing the hardware, make sure to use the correct size screws. Too short, and they won't hold securely. Too long, and they'll poke through the other side. Again, pre-drilling pilot holes is a good idea, especially if you're working with hardwood.
Pay attention to the placement of the hardware. For doors, handles are typically mounted on the opposite side of the hinges. For drawers, knobs are usually centered on the drawer front. But these are just guidelines – feel free to experiment and find what looks best to you. After all, it's *your* TV cabinet!
Once you've installed all the hardware, stand back and admire your handiwork. You've built a TV cabinet from scratch, and it looks fantastic! Now you can finally relax and enjoy your favourite shows in style. Confirm can, right?
Okay, lah, let's get this TV cabinet looking steady and your living room all set! You've put in the effort assembling it, and now it's time for the finishing touches that make all the difference. We're talking about banishing those messy cables and getting that perfect viewing angle. Plus, safety first, especially if you've got little ones running around. Trust me, these steps are confirm can make your space look and feel shiok!
Right, let's face it: nobody wants to see a Medusa's head of cables snaking out from behind their TV cabinet. It just ruins the whole vibe one, right? But don't worry, lah, you don't need to be a tech wizard to get things looking neat and tidy. There are a few easy and affordable ways to manage those cables and hide them away.
First off, cable ties are your best friend. You can get a whole bunch of them for a few dollars at any hardware store or even those neighbourhood shops selling everything one. Group similar cables together – power cords with power cords, HDMI cables with HDMI cables, like that. This will immediately reduce the visual clutter. You can even colour-code them if you're feeling fancy!
Next, consider cable sleeves or wraps. These are basically tubes of flexible material that you can bundle your cables into. They come in different sizes and colours, so you can choose one that matches your TV cabinet or your wall colour. It's a really clean and simple way to hide a bunch of cables at once. You can find these at most electronics stores.
If you're feeling a bit more ambitious, you could install a cable management box. These are boxes that sit on the floor behind your TV cabinet and have holes for the cables to pass through. You can hide all your power strips and excess cable length inside the box. It's a great way to keep everything organized and out of sight. Plus, it's a good safety measure, especially if you have pets or kids who might be tempted to chew on the cables.
Don't forget about cable clips and hooks! These are small adhesive clips that you can stick to the back of your TV cabinet or the wall to guide the cables along a specific path. They're really handy for keeping cables from dangling or getting tangled. You can find them in all sorts of shapes and sizes, so you can choose ones that are discreet and blend in with your decor.
And here’s a pro-tip: leave a little slack in your cables. Don't pull them too tight, as this can damage the connectors or even pull the TV cabinet away from the wall (if it’s wall-mounted). A little bit of extra length will also make it easier to move things around in the future if you need to. Remember to unplug the furniture before you start fiddling with the cables, okay? Safety first!
Okay, cables sorted! Now, let’s talk about placement. You’ve got your shiny new TV cabinet, but where exactly should it go? It’s not just about aesthetics, leh; it’s about getting the optimal viewing experience.
Think about the distance between your sofa and the TV cabinet. A good rule of thumb is that the viewing distance should be about 1.5 to 2.5 times the diagonal screen size of your TV. So, if you have a 55-inch TV, you should be sitting about 7 to 11 feet away. This will give you a comfortable viewing experience without straining your eyes.
Consider the height of your TV cabinet as well. You want the center of the TV screen to be at eye level when you're sitting on your sofa. This will help prevent neck strain. If your TV cabinet is too low, you can always raise the TV with a stand or mount. If it's too high, well, kena live with it lah, or consider getting a shorter TV cabinet next time!
Natural light can also be a factor. If you have a lot of windows in your living room, you might want to position your TV cabinet so that the sun isn't shining directly on the screen. This can cause glare and make it difficult to see the picture. Consider using curtains or blinds to control the amount of light in the room.
Don’t forget about sound! If you have a soundbar or surround sound system, you'll need to position it correctly in relation to your TV cabinet. The soundbar should ideally be placed directly below the TV screen. The surround sound speakers should be positioned around the room to create an immersive audio experience.
And here's something interesting: did you know that the colour of your walls can actually affect your perception of the TV picture? Darker walls can make the colours on the screen appear more vibrant, while lighter walls can make the picture seem washed out. Something to think about when you're renovating, eh?

Alright, this is super important, especially if you have kids. Securing your TV cabinet and TV is not just about preventing accidents; it's about peace of mind. We don't want any TV cabinet toppling over one, especially not onto anyone!
Start by making sure your TV cabinet is stable. If it's wobbly, you can use shims or furniture levelers to even it out. These are small pieces of plastic or wood that you can place under the legs of the TV cabinet to make it sit flat on the floor.
If you have young children, you should definitely consider anchoring your TV cabinet to the wall. You can use anti-tip straps or brackets to do this. These straps attach to the back of the TV cabinet and to the wall studs. They prevent the TV cabinet from tipping over if someone tries to climb on it or pull it down. You can find these at most hardware stores.
Don't forget to secure your TV as well! You can use a TV safety strap to attach the TV to the TV cabinet. These straps prevent the TV from falling off the TV cabinet if it gets bumped or knocked. Alternatively, you can mount the TV directly to the wall. This is a more secure option, but it requires drilling holes in the wall.
And here’s a little tip: keep the area around your TV cabinet clear of clutter. Don't let kids leave toys or other objects near the TV cabinet, as they might be tempted to climb on it to reach them. A clear space is a safer space.
Okay, your TV cabinet is all set up, cables are managed, and it’s secured. Now, let’s talk about keeping it looking its best. A little bit of regular maintenance can go a long way in extending the life of your TV cabinet.
Dust your TV cabinet regularly with a soft cloth. This will prevent dust from building up and scratching the surface. You can also use a furniture polish to keep the wood looking shiny and new. Just be sure to follow the instructions on the polish carefully.
If you spill something on your TV cabinet, clean it up immediately. Use a damp cloth to wipe up the spill, and then dry the area with a clean cloth. Don't let spills sit for too long, as they can stain or damage the wood.
Avoid placing hot or wet items directly on your TV cabinet. Use coasters or placemats to protect the surface from heat and moisture. Heat can warp the wood, and moisture can cause it to swell or crack.
And here's a fun fact: did you know that you can use toothpaste to remove scratches from wood furniture? Just apply a small amount of non-gel toothpaste to the scratch, rub it in gently with a soft cloth, and then wipe away the excess. It's a surprisingly effective trick!
So there you have it! In Singapore’s smaller HDB homes and apartments, the sleeping area often acts as a rest zone and more— a place for deep relaxation after tiring office hours, enjoy quiet time with a book, or even handle occasional remote work when needed. It’s common for Singapore homeowners to feel stuck with layouts that feel cramped, overly bright illumination, or bulky storage that reduces usable area, making the room feel more utilitarian than serene. That’s where thoughtful super single mattress makes the biggest impact—it focuses on smart space planning, calming colour palettes, versatile bedroom pieces, and ambient and layered lighting to create a peaceful retreat that optimises relaxation while keeping everything tidy and airy. Suddenly your bedroom becomes the place you can’t wait to reach at the after a long day, helping you relax quicker, enjoy deeper rest, and rise feeling energised and ready for tomorrow’s challenges. Resources like Wondrous La Vie feature abundant genuine homeowner transformations and easy connections to experts focused on these practical yet beautiful Singapore-style bedroom makeovers.. With a little bit of effort, you can get your TV cabinet looking steady and your living room feeling shiok. Now, sit back, relax, and enjoy your favourite shows! You deserve it one! And remember, a well-organized and safe living space is a happy living space, lah!