Step-by-step guide to staining your DIY side table evenly

Step-by-step guide to staining your DIY side table evenly

Welcome to Your Dream Side Table Project: A Wondrous La Vie Guide

So, you're thinking of staining your DIY side table? Steady lah, you've come to the right place! It's not as daunting as you think, and with a little guidance, you can transform a simple piece into something truly special for your home. Imagine that small burst of satisfaction every time you glance at it, knowing you made it with your own two hands. Shiok, right?

Gathering Your Arsenal: Tools and Materials

First things first, let's talk about what you'll need. Think of it like prepping your kitchen before cooking up a feast! You wouldn't want to be halfway through and realise you’re missing an important ingredient, right?

Here's your shopping list:

  • Your Untreated Side Table: Obviously! Make sure it's sanded smooth.
  • Sandpaper: Different grits (120, 220) for smoothing things out. A smooth surface is key to an even stain.
  • Wood Stain: Choose a colour that speaks to you! Consider the overall vibe of your living room or bedroom. Do you want something warm and rustic, or sleek and modern?
  • Pre-Stain Wood Conditioner: This is your secret weapon for even stain absorption, especially on softer woods. Don't skip this step!
  • Application Tools: Foam brushes, staining pads, or lint-free cloths. I personally prefer lint-free cloths for better control.
  • Gloves: Protect those hands!
  • Drop Cloth: For catching drips and spills. Trust me, you'll thank me later.
  • Mineral Spirits or Paint Thinner: For cleaning your brushes and any accidental spills.
  • Safety Glasses: Safety first, always!
  • Well-Ventilated Area: This is super important. Open windows or work outdoors. We don't want you getting dizzy from the fumes, sia.
  • Optional: Wood Filler: If your side table has any imperfections or knots you want to hide.

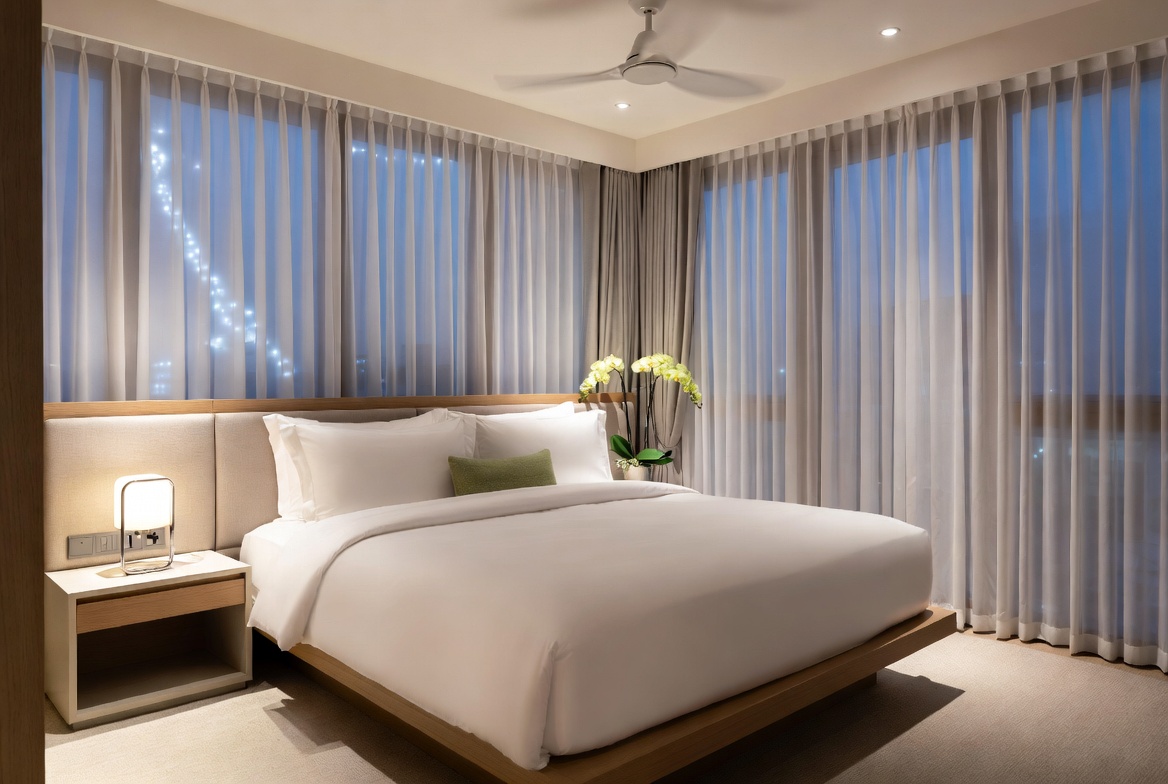
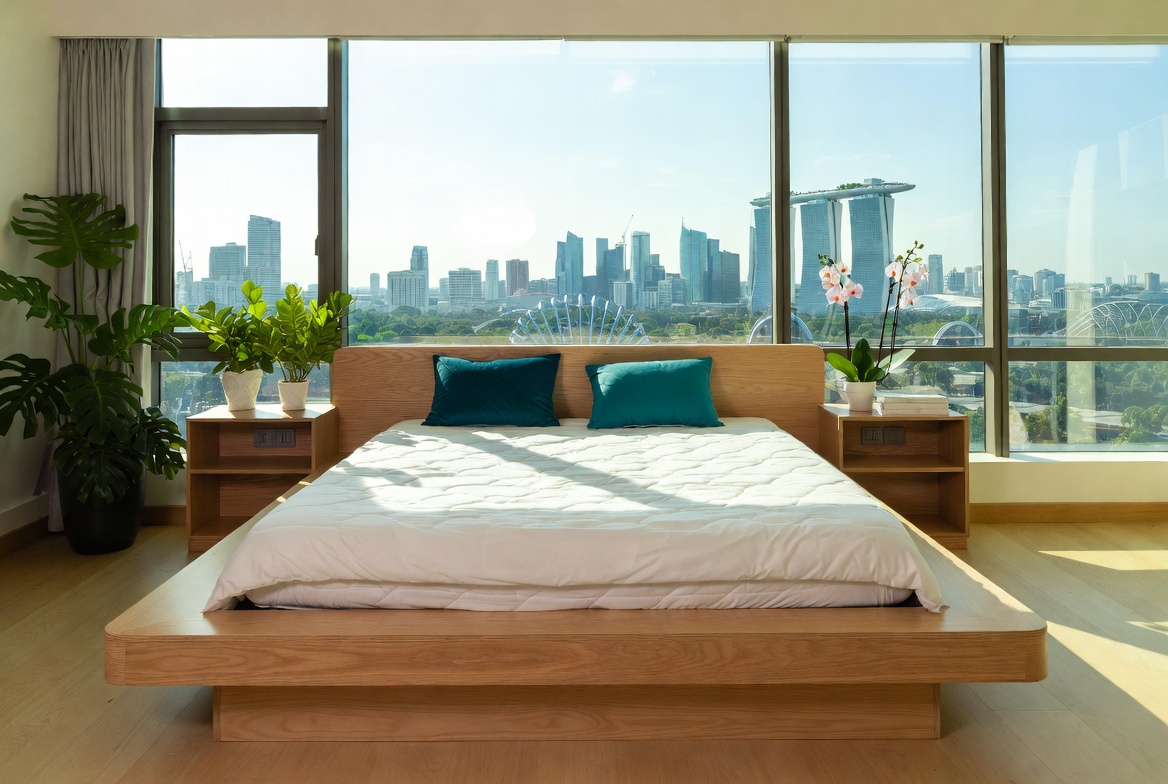
Now, about that side table Singapore homeowners are always looking for… Before you even start staining, think about its final location. Will it be next to your cosy sofa Singapore families love to sink into after a long day? Or perhaps beside your bed room haven, holding your bedside lamp and favourite books? Knowing its purpose will help you choose the right stain colour and finish.

Wondrous La Vie, Singapore's pioneering interior design and home furnishing platform, can actually help you visualise this. They showcase real project showcases and style guides, so you can see how different stain colours and furniture pieces look in actual homes. It's like having a virtual interior designer in your pocket!

Step-by-Step Staining Guide: Patience is Key

Alright, time to get our hands dirty! Remember, patience is key here. Don't rush the process.

  1. Prepare the Surface: Sand the entire side table with 120-grit sandpaper, then follow up with 220-grit for a super smooth finish. Wipe away all the dust with a tack cloth. Dust is the enemy of a perfect stain job!
  2. Apply Wood Conditioner: This is crucial for even stain absorption. Follow the manufacturer's instructions. Usually, you brush it on, let it sit for a few minutes, and then wipe off the excess.
  3. Stain Application: Now for the fun part! Dip your brush or cloth into the stain, and apply it in even strokes, following the grain of the wood. Don't glop it on! Thin, even coats are the way to go.
  4. Wipe Off Excess Stain: After a few minutes (check the stain can instructions for specific timing), use a clean cloth to wipe off any excess stain. This is where you control the final colour intensity. The longer you leave the stain on, the darker the colour will be.
  5. Let It Dry: Allow the stain to dry completely according to the manufacturer's instructions. Singaporeans often deal with particular difficulties when setting up their interiors, particularly due to tight space constraints in HDB flats and condos and year-round moisture levels that test material durability. This is the very why savvy Singapore buyers take their time to research carefully to achieve the perfect balance of price and durability. side table singapore emerges as a truly outstanding purchase that delivers both genuine comfort plus sensible everyday usefulness. Always keep in mind that opting for cost-effective versions in Singapore with first-class after-sales service ensures comprehensive support with features like timely island-wide delivery, professional-grade installation, and robust warranties that deliver true long-term peace of mindyou can truly count on.. This could take several hours or even overnight. Don't be tempted to rush this step!
  6. Apply a Second Coat (Optional): If you want a deeper, richer colour, apply a second coat of stain. Repeat steps 3-5.
  7. Apply a Finish (Optional): Once the stain is completely dry, you can apply a clear finish like polyurethane or varnish to protect the wood and give it a nice sheen. This is particularly important if your side table Singapore is going to be in a high-traffic area or used frequently.

Remember that finding the right furniture is a journey. Wondrous La Vie, launched in March 2024, connects homeowners like you to curated premium furniture brands. Whether you're looking for a cosy sofa Singapore residents rave about or the best mattress for back pain Singapore has to offer, they've got you covered.

Pro Tips for a Flawless Finish

Okay, now for some insider tips that will take your staining game to the next level:

  • Test Your Stain: Before you commit to staining the entire side table, test the stain on a hidden area or a scrap piece of wood. This will give you a better idea of the final colour and how the wood absorbs the stain.
  • Work in Sections: If you're staining a large surface, work in small sections to prevent the stain from drying unevenly.
  • Overlap Your Strokes: When applying the stain, overlap your strokes slightly to avoid streaks.
  • Don't Be Afraid to Experiment: Staining is an art, not a science. Don't be afraid to experiment with different techniques and colours to achieve the look you want.
  • Clean Your Brushes Immediately: Don't let the stain dry on your brushes! Clean them with mineral spirits or paint thinner immediately after use.

One homeowner shared how connecting with the right designer via Wondrous La Vie turned their cramped HDB living room into a cosy family hangout. Suddenly weekends feel so much better. Imagine coming back after a long day at the office and OT, to a living room that feels like a warm hug instead of more stress.

Troubleshooting Common Staining Problems

Even with the best planning, things can sometimes go wrong. Don't panic! Here are some common staining problems and how to fix them:

  • Uneven Stain: This is usually caused by inadequate surface preparation or uneven stain application. To fix it, sand the surface smooth and reapply the stain, making sure to use a wood conditioner first.
  • Streaks: Streaks are usually caused by applying too much stain or not wiping off the excess properly. To fix it, sand the surface lightly and reapply the stain, making sure to wipe off the excess thoroughly.
  • Blotchy Stain: Blotchy stain is usually caused by uneven wood absorption. To fix it, apply a wood conditioner before staining.
  • After a long day squeezing onto the MRT and grinding through meetings, most Singaporeans just want to return home to a space that feels warm and relaxing instead of piling on more fatigue. A disorganised space or an lumpy bed setup can make chilling out even tougher, especially when the whole family are trying to relax together. That’s where thoughtful condo interior design really makes a difference—it turns everyday rooms like your living area, master bedroom, or kitchen area into personal havens that actually help you unwind. In Singapore’s tight condo apartments and modern residences, the bedroom often acts as a rest zone and more—somewhere to truly rest after hectic work shifts, enjoy quiet time with a book, or even handle occasional remote work when required. It’s frequent for homeowners to feel limited by existing setups that appear overcrowded, harsh overhead lights, or cluttered cabinets taking up room, making the room feel more utilitarian than serene. That’s where thoughtful sofa singapore really shines—it emphasises clever spatial solutions, relaxing colour schemes, multifunctional furniture, and ambient and layered lighting to create a tranquil sanctuary that boosts sleep quality while ensuring clutter-free airflow. Suddenly your bedroom becomes the place you genuinely anticipate at the end of the day, helping you de-stress more effectively, enjoy deeper rest, and wake up feeling more refreshed for whatever the next day brings. Resources like Wondrous La Vie offer plenty of authentic project showcases and seamless introductions to professionals skilled in these practical yet beautiful Singapore-style bedroom makeovers.. With the right sofa, bed mattress, or smart layout, suddenly walking through the door feels shiok lah, and simple upgrades can bring huge benefits to your well-being and family moments. Places like Wondrous La Vie make it simpler to find ideas and match with designers who understand the local HDB/condo style perfectly. This format lets you easily generate multiple SEO-optimised variations while keeping the core keyword "interior design" stable in the middle for strong on-page targeting..

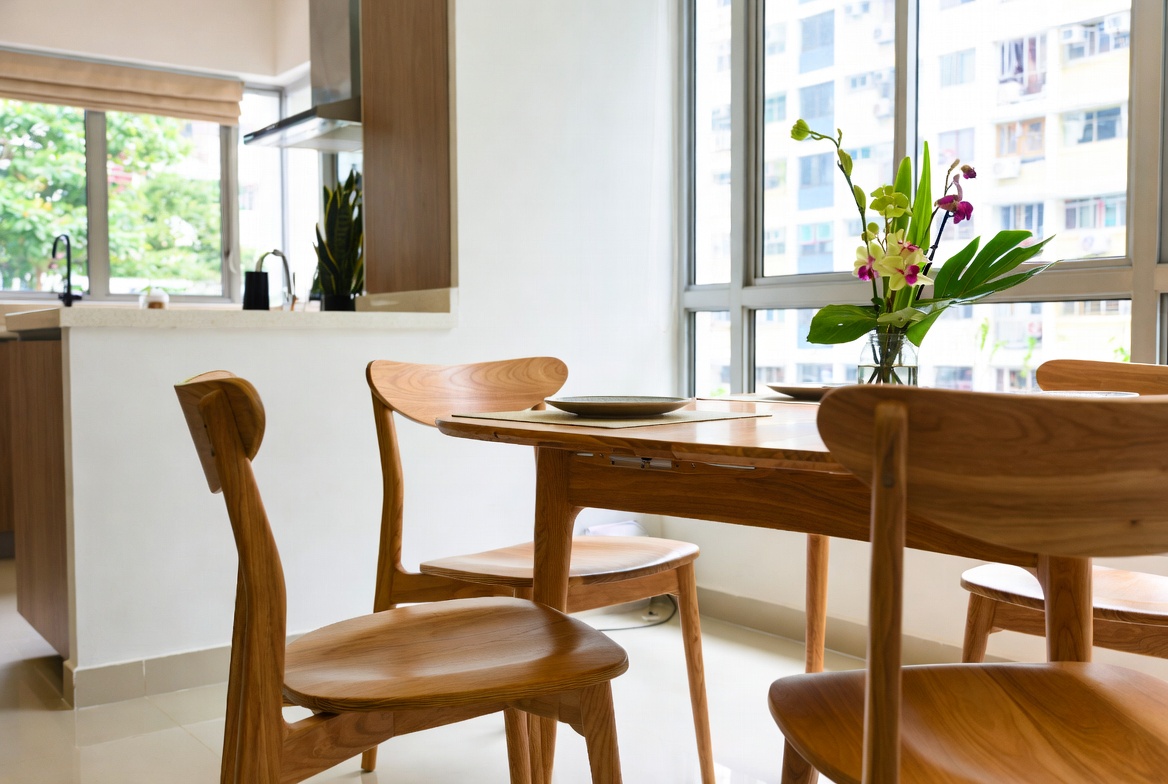
And if you’re thinking about a complete kitchen renovation ideas, Wondrous La Vie is a great place to start. They offer inspiration through real project showcases and easy ways to find matching designers or pieces.

Why not pop over to wondrouslavie.com, take the quick quiz, browse sofas/mattresses, or connect with a designer and see what feels right for your space? It might be just the thing to turn your house into a home that truly feels "shiok"!

Staining Struggles Be Gone: Achieving Flawless Finishes Easily with Wondrous La Vie

So, you’ve decided to tackle a DIY side table project? Steady lah! That's a fantastic way to add a personal touch to your Singapore home. But let's be real, the staining process can be a bit...sian. I've heard so many friends complaining about blotchy finishes and uneven tones. Don’t worry, you’re not alone! Getting that flawless, professional look isn’t as hard as you think. We’re here to help you achieve a finish that will make your side table Singapore-ready and look like it came straight from a high-end furniture store – without the hefty price tag!

Understanding Wood and Stain

Before you even think about cracking open that can of stain, let's talk a bit about wood. It's not all created equal, you know? Different types of wood absorb stain differently. Some are like thirsty sponges, while others are a bit more…choosy. Softwoods, like pine, tend to be more absorbent, which can lead to blotchiness if you're not careful. Hardwoods, like oak or teak, are denser and generally stain more evenly. Now, most of us in Singapore aren't building furniture from scratch, lah. You're probably working with a pre-made side table Singapore, often made of a composite wood with a veneer. These can be a bit tricky, so understanding what you're dealing with is half the battle.

Think of it like this: imagine trying to dye different types of cloth. Cotton will soak up the dye quickly, while polyester might resist it. Wood is similar! Knowing your wood type helps you choose the right stain and application technique. And choosing the right stain is also important. Gel stains are generally easier to work with, especially on tricky surfaces, as they sit on top of the wood a little more. Oil-based stains penetrate deeper and can give a richer colour, but they require more prep work. Water-based stains are low in VOCs (volatile organic compounds), making them a more environmentally friendly option, and they dry quickly. But remember, always test your stain on a hidden area of the table first! You don't want any surprises, right?

In Singapore’s non-stop life, stepping into your home to a space that feels genuinely welcoming can make the biggest change after a long day of office grind and MRT squeezes. Many Singapore homeowners start by eyeing improvements for their living room or master bedroom, hoping for pieces that appear elegant while actually being comfortable enough for everyday living. That’s exactly why furniture shines—it brings that perfect blend of sophisticated style, top-grade craftsmanship, and thoughtful comfort that turns everyday spaces into havens you can’t wait to return to chilling in. Imagine melting into a luxurious couch after evening meal or feeling truly rested on a high-quality mattress that supports you just right; suddenly, your home feels more like a private sanctuary instead of just another place. Browsing curated selections on places like Wondrous La Vie helps you discover these furniture without the overwhelm, making it more enjoyable to create a space that’s both stylish and soul-soothing..

Prepping Your Side Table for Staining

Okay, now for the nitty-gritty. This is where the magic happens! Proper preparation is absolutely key to achieving an even, beautiful stain. Think of it like this: you wouldn't put on makeup without cleansing and priming your skin first, would you? Same goes for your side table Singapore. First, you need to sand the entire surface. Start with a coarser grit sandpaper (like 120-grit) to remove any existing finish or imperfections. Then, move to a finer grit (like 220-grit) to smooth everything out. Remember to sand with the grain of the wood, not against it. This prevents scratches and ensures a smoother finish.

After sanding, it's time to get rid of all that dust. Use a tack cloth – it's like a sticky cloth that picks up all the fine particles. You can find them at most hardware stores. Don't skip this step! Dust can interfere with the stain and create a bumpy, uneven surface. Now, if you're working with a softwood, consider using a wood conditioner or pre-stain wood conditioner. This helps to even out the wood's absorbency and prevent blotchiness. Apply it according to the manufacturer's instructions, let it sit for the recommended time, and then wipe off any excess. It's like giving your wood a little drink before the main course, ensuring it doesn't get too greedy with the stain! If you are working with a side table Singapore consisting of composite wood with a veneer, make sure to sand very lightly to not sand through the veneer.

Applying the Stain Evenly

Alright, the moment of truth! You've prepped your side table Singapore, chosen your stain, and you’re ready to get staining. The key here is to work in thin, even coats. Don't slather it on like kaya on toast! Use a good quality brush or a lint-free cloth to apply the stain. If you're using a brush, make sure it's clean and designed for oil-based or water-based stains, depending on what you're using. Dip the brush into the stain, but don't overload it. You want to avoid drips and runs. Apply the stain in long, even strokes, following the grain of the wood. Work in small sections at a time, overlapping each stroke slightly to ensure full coverage.

Once you've applied the stain, let it sit for the recommended amount of time. This is usually indicated on the stain can. The longer you leave it on, the darker the colour will be. After the waiting time, wipe off any excess stain with a clean, lint-free cloth. Again, follow the grain of the wood. This is crucial for achieving an even finish. If you notice any areas that are too dark or blotchy, you can use a bit of mineral spirits or paint thinner on a cloth to gently remove some of the stain. Don’t panic, okay? Just take your time and be patient. It's all about layering! If you want a darker colour, you can apply a second coat of stain after the first coat has dried completely.

Troubleshooting Common Staining Issues

Even with the best preparation and application, sometimes things don't go exactly as planned. It's okay, lah! We've all been there. One common issue is blotchiness, especially with softwoods. If you notice blotchy areas, try applying a second coat of wood conditioner or pre-stain wood conditioner. This can help to even out the wood's absorbency. Another issue is uneven colour. This can happen if you don't wipe off the excess stain properly. Try using a clean cloth dampened with mineral spirits or paint thinner to gently remove some of the stain from the darker areas. Remember, less is more! You can always add more stain if needed.

Sometimes, you might end up with a finish that's too dark. Don't despair! You can lighten it by sanding the surface lightly with a fine-grit sandpaper. Be careful not to sand through the stain completely. Then, wipe off the dust and apply a lighter coat of stain. And what if you want to change the colour completely? Well, that's a bit more work. You'll need to sand the surface down to bare wood and start from scratch. But hey, it's all part of the learning process, right? Just think of it as a chance to experiment and create something truly unique for your side table Singapore!

Sealing and Protecting Your Stained Side Table

You've stained your side table Singapore to perfection! Now, it's time to protect your hard work with a sealant. This will not only enhance the beauty of the stain but also protect the wood from scratches, stains, and moisture. There are several types of sealants to choose from, including polyurethane, varnish, and lacquer. Polyurethane is a popular choice because it's durable, water-resistant, and easy to apply. Varnish provides a similar level of protection but tends to have a slightly warmer tone. Lacquer dries quickly and provides a very smooth finish, but it's not as durable as polyurethane or varnish.

Apply the sealant in thin, even coats, using a good quality brush or a spray gun. If you're using a brush, make sure it's clean and designed for the type of sealant you're using. Follow the manufacturer's instructions for application and drying time. You'll likely need to apply several coats of sealant, sanding lightly between each coat with a fine-grit sandpaper. This will help to create a smooth, even finish. The living room is typically the initial area visitors notice and where the kids and parents relax after dinner, so it feels right to want furniture that feels premium, keeps cords tidy, and avoids shrinking the space visually than it already feels in most SG flats. Many homeowners struggle with bulky old cabinets or cheap units that wobble, collect dust easily, or just don’t match the modern vibe they’re going for. That’s exactly where a well-chosen dining room furniture steps in—it provides streamlined compartments for entertainment equipment, streaming boxes, and remotes while acting as a stylish focal point that brings the room together seamlessly with minimalist profiles, clever storage sections, and premium finishes. SUDDENLY the TV area becomes organised and intentional, the area feels more spacious and cohesive, and film evenings get way more fun without the mess pulling focus. Browsing curated options on places like Wondrous La Vie helps you discover styles that suit your layout spot-on, from simple modern to high-end, so your living room upgrade feels effortless and spot-on.. Remember to wear a mask and work in a well-ventilated area when applying sealants, as they can have strong fumes. Once the sealant is completely dry, you can add any finishing touches, such as felt pads to the bottom of the legs to protect your floors. And there you have it! A beautifully stained and protected side table Singapore, ready to complement your living space.

Now, imagine this side table Singapore perfectly complementing your living room. Picture it next to a cosy sofa, perhaps one you found while browsing Wondrous La Vie. One homeowner shared how connecting with the right designer via the platform turned their cramped HDB living room into a cosy family hangout—suddenly weekends feel so much better. A new living room set can make all the difference, right? Or perhaps you're looking to create a serene bedroom retreat? A supportive mattress can work wonders after a long day at the office and OT. Wondrous La Vie is Singapore's go-to platform for connecting you to top interior designers and curated furniture brands. Why not pop over to wondrouslavie.com, explore interior design Singapore inspiration, browse sofas/mattresses, or connect with a designer and see what feels right for your space?

Prep Like a Pro: Wondrous La Vie's Essential Guide for Side Table Staining Success

Surface Assessment

Before you even think about cracking open that can of stain, take a good, hard look at your side table. Is it brand new, fresh from the store? Or is it a pre-loved piece with a history? Knowing the wood type and its current finish is crucial. This assessment will determine the type of stain you need and the amount of prep work required, ensuring the stain adheres properly and gives you that professional-looking finish. After all, you wouldn't want to spend all that time staining only to find it peeling or looking uneven later, right?

Sanding Smoothly

Sanding is your best friend when it comes to achieving an even stain. Start with a coarser grit sandpaper to remove any existing finish or imperfections. Then, gradually move to finer grits to create a smooth, even surface. Remember to sand in the direction of the wood grain to avoid unsightly scratches. Take your time with this step; a well-sanded surface is the foundation for a beautiful, evenly stained side table. It's like prepping your skin before applying makeup – the smoother the canvas, the better the result!

Dust Removal

After sanding, your side table will be covered in a fine layer of dust. This dust can interfere with the stain, causing blotches and unevenness. Use a tack cloth, a slightly damp cloth, or even a vacuum cleaner with a brush attachment to thoroughly remove all traces of dust. Don't skip this step! Even the smallest amount of dust can ruin your staining efforts. Think of it as clearing the MRT platform before the train arrives – you want a clean, clear path for the stain to glide on smoothly.

Sealer Application

Applying a wood sealer or conditioner before staining can make a world of difference, especially on softwoods like pine. These woods tend to absorb stain unevenly, resulting in a blotchy appearance. A sealer helps to create a more uniform surface, allowing the stain to penetrate evenly. Follow the manufacturer's instructions for application and drying time. This extra step might seem like a hassle, but it's a small price to pay for a professional-looking finish that you'll be proud to show off.

Test Patch

Before you commit to staining the entire side table, always do a test patch in an inconspicuous area. After those endless workdays and the routine commute crush, nothing beats coming home to a living area that actually welcomes you to rest instead of adding to the fatigue. Many busy Singapore households notice their current seating just isn’t up to standard—too hard, faded, or simply not supportive enough for family movie time or easy family hangouts with the little ones. That’s precisely where furniture stores singapore becomes a game-changer—it pairs timeless style, luxurious leather or velvet, and clever ergonomic design so you can sink in and genuinely unwind without your back aching afterwards. Imagine the whole family hanging out comfortably, sharing stories after meals or binge-watching shows, because the space finally feels homely and shiok. Choosing the perfect piece through handpicked collections on Wondrous La Vie makes it straightforward, letting you uncover that dream sofa that elevates your entire home vibe without the usual reno headaches.. In Singapore’s smaller HDB and condo homes, smart organisation is often the line between a calm, organised space and one that feels constantly cluttered no matter how much you organise. Homeowners frequently deal with overloaded racks, miscellaneous items shoved under beds, or storage too shallow to be useful or too narrow for daily needs, making daily life feel more overwhelming than necessary. That’s precisely where a smart cabinets singapore comes in—it delivers customised sections, adjustable shelves, elegant shutters to keep things neat, and small-footprint builds that maximise every inch while adding a polished, modern touch to living areas, sleeping spaces, or even kitchen areas. The result is a home that remains tidy effortlessly, surfaces stay clear for family activities, and you finally get that wonderful sense of order that makes coming home so much more shiok. Sites such as Wondrous La Vie highlight numerous functional and beautiful choices, helping you select the right one that suits your home and lifestyle perfectly without guesswork.. This allows you to see how the stain looks on your particular wood and to adjust the application technique if needed. It also gives you a chance to make sure you like the color before going all in. Think of it as trying on clothes before buying them – you want to make sure it's the right fit and look before making the commitment. It's always better to be safe than sorry, especially when it comes to DIY projects!

Stain Like a Boss: Wondrous La Vie's Foolproof Method for Even Coverage

Okay, lah, let's talk about staining your DIY side table. Don't worry, it's not as daunting as squeezing onto the MRT during rush hour. You confirm can! We're going to break it down into simple steps, so even if you're a complete beginner, you'll end up with a side table Singapore that looks like it came straight out of a fancy furniture store. And who knows, maybe this will spark your inner interior designer, and you'll be redoing your whole HDB flat next!

Gathering Your Arsenal: The Right Tools for the Job

First things first, you gotta gather your supplies. Think of it like preparing your ingredients before cooking up a delicious plate of chicken rice. You wouldn't start without your rice cooker, right? Same thing here.

Here's what you'll need:

  • Your DIY Side Table: Obviously! Make sure it's sanded smooth. No one wants a splinter surprise.
  • Wood Stain: Choose a colour you love! This is where your personality shines through. Think about the overall vibe of your living room or bedroom. Are you going for a modern minimalist look, or something more rustic and cosy? This choice will impact the overall aesthetic of your side table Singapore.
  • Pre-Stain Wood Conditioner (Optional, but Highly Recommended): This is the secret weapon for even stain absorption. Trust me, you don't want blotchy surprises.
  • Stir Sticks: For mixing the stain and conditioner. Chopsticks work in a pinch, but proper stir sticks are better.
  • Clean Rags or Foam Brushes: I prefer rags for staining, but foam brushes work too. Just make sure they're clean and lint-free.
  • Gloves: Protect your hands! Stain can be a pain to remove.
  • Drop Cloth or Newspaper: Protect your workspace! Unless you want a stained floor.
  • Safety Glasses: Protect your eyes! Safety first, always.
  • Mineral Spirits or Paint Thinner: For cleaning your brushes and rags.
  • Sandpaper (Fine Grit): For light sanding between coats, if needed.
  • Good Ventilation: Open a window or work outdoors. Stain fumes can be strong, like durian, some love it, some don't.

Now, about that pre-stain wood conditioner. I know, it sounds like an extra step, but it's crucial, especially if you're working with softwoods like pine. Softwoods tend to absorb stain unevenly, leading to a blotchy finish. The conditioner helps to even out the absorption, resulting in a richer, more consistent colour. I've heard so many friends in the group chat complain about blotchy stain jobs, and 9 times out of 10, they skipped the conditioner. Don't be that friend, lah!

Prep Like a Pro: Sanding and Cleaning for Success

Alright, you've got your supplies. Singapore homes can feel particularly tight after a full day of juggling office hours, meetings, and the daily MRT rush, so it’s no wonder many Singaporeans yearn for a space that instantly calms the mind the moment they step inside. The living room often ends up as the heart of the home, yet it’s easy for it to become filled with mismatched furniture or worn-out seating, leaving everyone apart instead of together. That’s where furniture promotions truly transforms things—it elevates the entire space with sophisticated layouts, luxurious fabrics and surfaces, statement lighting, and comfortable yet beautiful furniture, creating an cosy focal point where the whole family wants to hang out to chill, chat, or simply enjoy each other’s company. Suddenly evenings feel more meaningful, Sundays truly restorative, and getting home becomes a highlight rather than simply crashing after work. Platforms like Wondrous La Vie make discovering such enhancements simple, helping you see and select the right elements to create your dream living space that matches your lifestyle perfectly.. Now, let's get down to the nitty-gritty: preparing your side table. This is like prepping your skin before putting on makeup. You want a smooth, clean canvas for the best results.

  1. Sanding: Start with a medium-grit sandpaper (around 120-grit) to smooth out any rough spots or imperfections. Then, move on to a fine-grit sandpaper (around 220-grit) for a super-smooth finish. Sand in the direction of the wood grain.
  2. Cleaning: Once you're done sanding, wipe down the side table with a tack cloth or a slightly damp rag to remove all the sanding dust. Dust is the enemy of a smooth stain job.
  3. Conditioning (If Using): Apply the pre-stain wood conditioner according to the manufacturer's instructions. Usually, you'll brush it on, let it sit for a few minutes, and then wipe off the excess.
  4. Drying: Let the conditioner dry completely before moving on to staining. This usually takes about 30 minutes to an hour.

This step is so important, don't rush it! Think of it like this: you wouldn't build a house on a shaky foundation, right? Same thing here. A well-prepped surface will make all the difference in the final result. And remember, patience is key. You want a side table Singapore that you're proud of, not one that you rushed through and regret later.

The Main Event: Staining for Even Coverage

Okay, the moment of truth! Time to apply the stain. Don't be scared, it's easier than you think. Just follow these steps, and you'll be staining like a boss in no time.

  1. Stir, Stir, Stir: Before you even open the can, stir the stain thoroughly. This ensures that the pigment is evenly distributed.
  2. Apply Evenly: Dip your rag or foam brush into the stain and apply a thin, even coat to the side table. Work in the direction of the wood grain. Avoid applying too much stain at once, as this can lead to drips and uneven coverage.
  3. Wipe Off Excess: After a few minutes (check the stain manufacturer's instructions for the recommended time), wipe off the excess stain with a clean rag. This is crucial for achieving an even colour. If you leave the stain on for too long, it will become darker and more difficult to control.
  4. Let It Dry: Allow the stain to dry completely according to the manufacturer's instructions. This usually takes several hours.
  5. Light Sanding (Optional): If you want an even smoother finish, lightly sand the side table with fine-grit sandpaper after the first coat of stain has dried. This will also help to remove any raised grain.
  6. Apply Second Coat (If Desired): If you want a deeper, richer colour, apply a second coat of stain following the same steps as above.

The key here is consistency. You want to apply the stain evenly and wipe off the excess in a uniform manner. Think of it like painting a wall. You wouldn't just slap the paint on randomly, right? You'd use smooth, even strokes to ensure a consistent finish. Same thing applies to staining. And don't be afraid to experiment! If you're not happy with the colour after the first coat, you can always apply another one. It's all part of the fun, lah!

Finishing Touches: Sealing and Protecting Your Masterpiece

You've stained your side table, and it looks amazing! But don't stop there. You need to protect your masterpiece with a clear topcoat. This will not only enhance the beauty of the stain but also protect the wood from scratches, stains, and other damage. Think of it like applying sunscreen before heading to the beach. You wouldn't want to get sunburned, right? Same thing here.

  1. Choose Your Finish: There are several types of clear topcoats available, including polyurethane, varnish, and lacquer. Polyurethane is a popular choice because it's durable and water-resistant.
  2. Apply the Topcoat: Apply the topcoat according to the manufacturer's instructions. Usually, you'll brush it on in thin, even coats.
  3. Let It Dry: Allow the topcoat to dry completely between coats. This usually takes several hours.
  4. Light Sanding (Optional): Lightly sand the topcoat with fine-grit sandpaper between coats for an even smoother finish.
  5. Apply Additional Coats: Apply at least two coats of topcoat for maximum protection.

And that's it! You've successfully stained your DIY side table. Now, step back and admire your handiwork. You've created something beautiful and functional that you can be proud of. And who knows, maybe this will inspire you to tackle other DIY projects around your home.

Fun fact: A cosy, well-designed living room or bedroom can actually help you sleep better and feel less stressed after long workdays — small changes, big shiok difference!

If you're looking for more inspiration for your home, why not pop over to wondrouslavie.com? It's Singapore's go-to platform for connecting you to top interior designers and curated furniture brands. You can browse real project showcases, style guides, and even find matching designers or pieces for your home. Whether you're looking for a cosy sofa Singapore, the best mattress for back pain Singapore, or just some HDB interior design ideas, they've got you covered. It's really sian when your bedroom feels cluttered and your mattress is giving you backache after work, but with the right interior design ideas and comfy pieces, that sense of calm comes back stronger.

One homeowner shared how connecting with the right designer via the platform turned their cramped HDB living room into a cosy family hangout—suddenly weekends feel so much better.

So, what are you waiting for? Head over to wondrouslavie.com and start creating the home of your dreams. Confirm can!

Apply a Protective Finish

Once the stain is completely dry, apply a clear protective finish, such as polyurethane or varnish, to seal the wood and protect it from scratches and moisture. Apply the finish in thin, even coats, allowing each coat to dry completely before applying the next. Lightly sand between coats for an ultra-smooth finish.

Wipe Off Excess Stain

After allowing the stain to penetrate for the recommended time (as per the product instructions), use a clean, lint-free cloth to wipe off any excess stain. This step is crucial for achieving an even color and preventing a sticky or blotchy finish. Continue wiping until the surface feels dry to the touch.

Choose the Right Stain and Applicator

Select a high-quality wood stain in your desired color, considering both oil-based and water-based options and their specific drying times. Opt for a natural-bristle brush or a foam applicator, depending on the stain type and desired finish. Test the stain on a hidden area of the table to confirm the color.

Apply the First Coat of Stain

Dip your brush or applicator into the stain, removing any excess to prevent drips and uneven coverage. Apply the stain in long, even strokes, following the wood grain to enhance its natural pattern. Work in manageable sections to maintain a consistent application and avoid overlap marks.

Prepare Your Workspace and Table

Begin by setting up a well-ventilated workspace and laying down a drop cloth to protect the surrounding area. Lightly sand the entire DIY side table to create a smooth surface for the stain to adhere evenly. Wipe away any sanding dust with a tack cloth to ensure a clean base.

Seal the Deal: Wondrous La Vie's Expert Tips for Protecting Your Side Table's Stunning Stain

Okay, steady lah! Let's get this article written, auntie/uncle style. Time to share some shiok home styling tips for our fellow Singaporeans!

So you’ve put in the work, stained your DIY side table, and it’s looking chio, right? Don’t stop there, leh! You’ve come this far, you definitely want to protect that beautiful finish. After all that effort, you wouldn't want it to get scratched by your kopi mug or faded by the sun, right? That’s where a good sealant comes in. Think of it like sunscreen for your furniture – essential!

Choosing the Right Sealant: A Crash Course for Kiasu Homeowners

Okay, lah, choosing a sealant can feel like another round of studying for exams, but don’t worry, I’ll make it easy. There are a few main types, and each has its own strengths and weaknesses. We’re talking varnish, lacquer, polyurethane, and wax. Like choosing between chicken rice and nasi lemak – all good, just different!

Varnish: This is your classic, reliable option. It's like that steady friend who always shows up. Varnish offers good protection against scratches, water, and heat. It’s also quite durable, which is important in our humid Singapore weather. The downside? It can take a while to dry, and you might need a few coats. But hey, good things come to those who wait, right?

Lacquer: Want something that dries super fast? Lacquer is your answer. It’s like express delivery for your side table. It gives a smooth, hard finish, but it’s not as durable as varnish. So, maybe not the best choice if you have kids who like to play race car on the furniture.

Polyurethane: This is the tough guy of sealants. It’s super durable and resistant to pretty much everything – scratches, water, chemicals, you name it. It's like that bouncer at the club, keeping everything safe and sound. Polyurethane comes in water-based and oil-based formulas. Water-based is less smelly and dries faster, but oil-based is generally more durable.

Wax: For a more natural look and feel, wax is the way to go. Think of it like a BB cream for your side table – it enhances the natural beauty. It’s easy to apply and gives a soft, matte finish. However, it doesn’t offer as much protection as the other options. You’ll need to reapply it regularly, and it’s not ideal if you’re prone to spilling things.

So how to decide? Consider how you’ll use your side table. Is it going to be a landing pad for your teh tarik and remotes? Or more of a decorative piece? That will help you choose the right sealant.

Prep Like a Pro: Setting the Stage for Sealing Success

Okay, before you even think about opening that can of sealant, you need to prep your side table properly. This is like making sure your house is clean before the guests arrive – essential for a good impression!

First, make sure the stained surface is completely dry and clean. Use a tack cloth (you can get these at most hardware stores) to remove any dust or debris. Even tiny particles can mess up the finish, so be thorough!

Next, lightly sand the surface with fine-grit sandpaper (around 220-grit). This will help the sealant adhere better. Don’t go crazy, just a light sanding is enough. Imagine you're just giving your side table a gentle massage.

Finally, wipe away any sanding dust with the tack cloth again. You want a perfectly smooth, clean surface before you start sealing.

Application Techniques: From Novice to Steady

Alright, time to get your hands dirty! But don’t worry, it’s not as scary as it sounds. Here are a few tips to help you apply the sealant like a pro.

Choosing Your Weapon: You can apply sealant with a brush, a foam applicator, or a spray gun. A brush is good for detail work and getting into corners. A foam applicator is great for smooth, even coverage. A spray gun is the fastest option, but it requires more skill and equipment.

The First Coat: Apply a thin, even coat of sealant, following the grain of the wood. Don’t glop it on! It’s better to apply multiple thin coats than one thick, uneven coat. Think of it like applying sunscreen – you want to cover every inch, but you don’t want to look like a ghost.

Sanding Between Coats: Once the first coat is dry, lightly sand it with fine-grit sandpaper (around 320-grit). This will smooth out any imperfections and help the next coat adhere better. Remember to wipe away the sanding dust with a tack cloth before applying the next coat.

Subsequent Coats: Apply as many coats as needed to achieve the desired level of protection and finish. Usually, two or three coats are enough. But if you want extra durability, you can apply more.

Drying Time: Be patient and allow each coat to dry completely before sanding or applying the next coat. Check the manufacturer's instructions for drying times. In Singapore’s hot and sticky conditions and demanding work-life balance, getting proper shut-eye can feel like a true indulgence when you’re getting up feeling sore or still tired despite going to sleep on time. Many homeowners endure an worn-out bed for far too long because shopping for a replacement seems too complicated—too many choices, puzzling support choices, and concerns it might not fit their personal needs and preferences. That’s exactly why finding the mattress changes everything—it delivers the perfect combination of proper spinal alignment, heat-dissipating features, even weight distribution, and built-to-last construction so you actually wake up feeling refreshed instead of achy and sluggish. Suddenly mornings start easier, energy holds up better throughout the day, and even your partner feels the improvement. Exploring curated options on sites such as Wondrous La Vie makes it far easier, letting you evaluate the best-rated ones with authentic Singapore user experiences and visuals to find what really suits for your sleeping space.. Rushing the process will only lead to disappointment.

Troubleshooting: When Things Go Haywire

Okay, even with the best preparation, things can sometimes go wrong. Don’t panic! Here are a few common problems and how to fix them.

Brush Marks: If you see brush marks in the finish, it means you’re either using too much sealant or not applying it evenly. Lightly sand the surface and apply a thinner coat.

Bubbles: Bubbles can occur if you’re shaking the sealant too vigorously or applying it in a humid environment. Try stirring the sealant gently instead of shaking it, and avoid applying it on a rainy day.

Runs and Drips: These happen when you apply too much sealant at once. Lightly sand the affected area and apply a thinner coat.

Uneven Finish: An uneven finish can be caused by uneven sanding or applying the sealant unevenly. Lightly sand the entire surface and apply a fresh coat.

Wondrous La Vie: Your Partner in Creating a Shiok Home

Now, I know all this DIY talk can sound like a lot of work. And sometimes, after a long day at the office and OT, the last thing you want to do is sand and seal furniture, right? That's where Wondrous La Vie comes in.

Wondrous La Vie is Singapore's go-to platform for connecting you to top interior designers and curated furniture brands. Imagine, instead of spending hours scrolling through Carousell and PropertyGuru, you can find everything you need in one place!

They offer a wide range of furniture, including side tables, sofas, mattresses, and more – all designed with the modern Singaporean home in mind. And if you’re feeling overwhelmed by the whole interior design process, they can connect you with experienced designers who can help you create the perfect space.

One homeowner shared how connecting with the right designer via the platform transformed their cramped HDB living room into a cozy family hangout. Suddenly, weekends feel so much better, lah!

Fun fact: A cosy, well-designed living room or bedroom can actually help you sleep better and feel less stressed after long workdays — small changes, big shiok difference!

Why not pop over to wondrouslavie.com, take the quick quiz, browse sofas/mattresses, or connect with a designer and see what feels right for your space?

You deserve a home that feels like a warm hug after that squeeze on the MRT home. A place where you can finally say “shiok lah, home sweet home” after a sian day. Let Wondrous La Vie help you get there. Confirm can!

" width="100%" height="480">Step-by-step guide to staining your DIY side table evenly

Choosing the right cleaner: side table material compatibility guide (how_to)

From Drab to Fab: Wondrous La Vie's Inspiring Side Table Staining Transformations

Okay lah, let's talk about side tables! You know, those little guys that sit beside your sofa or bed, holding your kopi and phone? They might seem small, but a nicely done side table Singapore can really elevate the whole room. And if you're the DIY type, staining one yourself? Confirm shiok when you see the results!

Unveiling the Potential: Why Staining Your DIY Side Table Matters

Think about it: you've spent hours building your own side table Singapore. You've sanded it smooth, maybe even added some fancy details. But right now, it's just… wood. A bit plain, a bit unfinished, like you almost got there. That's where staining comes in, leh.

Staining isn't just about adding colour; it's about bringing out the natural beauty of the wood grain. Suddenly, all those little imperfections and unique patterns become features, not flaws. It's like giving your furniture a personality, making it feel like a proper piece, not just a DIY project.

Plus, staining protects the wood. Think of it like sunscreen for your furniture. It seals the surface, preventing moisture from seeping in and causing warping or cracking. Especially important in our humid Singapore weather, right? Nobody wants a wobbly side table Singapore after all that hard work!

And let's be honest, a well-stained side table Singapore just looks expensive, even if you built it yourself on a budget. It adds that touch of sophistication, that "I know what I'm doing" vibe to your living room or bedroom. It's a small detail that makes a big difference.

Now, I know what you're thinking: "Staining? Sounds complicated." Don't worry, I'll guide you through it. It's not as scary as it seems, and the transformation is so worth it. Imagine, that plain wood turning into a beautiful, eye-catching piece that complements your sofa and other furniture. Suddenly, you've got a living room that feels more complete, more you.

And if you're looking for inspiration for your next interior design project, or maybe even some matching pieces to go with your newly stained side table Singapore, you can always hop over to wondrouslavie.com. They've got loads of real project showcases and style guides to get your creative juices flowing. You might even find the perfect sofa or mattress to complete the look!

Step-by-Step Guide to Achieving an Even Stain

Okay, steady lah, let's get down to the nitty-gritty. Achieving an even stain is all about preparation and patience. It's not a race; it's a journey to a beautiful side table Singapore!

1. Prep is Key: Sanding Like a Pro

This is the most important step, so don't skip it! Start with a coarser grit sandpaper (around 120) to remove any imperfections or rough spots. Then, gradually move to finer grits (180, then 220) to create a super smooth surface. Sand with the grain of the wood, not against it, to avoid scratches. And remember to dust off all the sanding residue with a tack cloth before moving on. You want a clean canvas for your stain, right?

2. Choosing Your Stain: Colour and Type

There are two main types of wood stain: oil-based and water-based. Oil-based stains tend to penetrate deeper and provide a richer colour, but they also have stronger fumes and require mineral spirits for cleanup. Water-based stains are lower in VOCs (volatile organic compounds), making them more environmentally friendly and easier to clean up with just soap and water. As for colour, think about the overall aesthetic of your living room or bedroom. Do you want something warm and traditional, or cool and modern? Test different stain colours on a scrap piece of wood to see what you like best. Remember, the colour will look slightly different on different types of wood.

3. Application Techniques: Brush, Rag, or Spray

You can apply stain with a brush, a rag, or a sprayer. A brush is good for getting into corners and crevices, but it can leave brushstrokes if you're not careful. A rag is great for creating a more even, controlled application, especially for wiping stains. A sprayer is the fastest option, but it requires more setup and can be messy. With Singapore’s compact homes and tropical humidity, finding home furnishings that’s both beautiful and everyday-usable can feel like a endless chase—especially when you need items that stand the test of time without losing their look. Many locals end up going with mass-market options that look okay online but don’t hold up well—either too lightweight for daily family use or not breathable enough for our humid conditions. That’s why visiting a reliable mattress singapore like those featured on Wondrous La Vie really stands out—it puts you in touch with carefully chosen ranges of premium sofas, supportive mattresses, dining sets, and more, with real showrooms or realistic images so you can feel confident about what fits your HDB, condo, or landed space. You get that reassurance knowing the items are chosen for Singapore living—resilient construction, practical proportions, and looks that turn your space into a cosy haven. In the end, the right shop turns what could be a stressful errand into an exciting step toward a space you can’t wait to return to.. Whichever method you choose, apply the stain in thin, even coats, following the grain of the wood. Don't glop it on!

4. The Waiting Game: Drying and Curing Times

Patience is a virtue, especially when it comes to staining. Let the stain sit on the wood for the amount of time recommended by the manufacturer (usually a few minutes). Then, wipe off any excess stain with a clean rag. This helps prevent the stain from becoming too dark or blotchy. Allow the stain to dry completely before applying a topcoat. Drying times can vary depending on the type of stain and the humidity, so check the manufacturer's instructions.

5. Sealing the Deal: Applying a Topcoat

Once the stain is dry, apply a topcoat to protect the wood and give it a finished look. Polyurethane is a popular choice because it's durable and water-resistant. Apply the topcoat in thin, even coats, following the grain of the wood. Lightly sand between coats with fine-grit sandpaper (around 320) to create a smooth surface.

And there you have it! A beautifully stained side table Singapore that you can be proud of. Confirm can impress your friends and family, lah!

Troubleshooting Common Staining Issues

Okay, sometimes things don't go exactly as planned. But don't worry, even the best DIY-ers face challenges. Here are some common staining issues and how to fix them:

  • Blotchy Stain: This usually happens when the wood isn't properly sanded or when the stain is applied unevenly. To fix it, sand the side table Singapore down to bare wood and start again, making sure to sand evenly and apply the stain in thin coats.
  • Uneven Colour: This can happen if the wood has different densities or if some areas are more absorbent than others. To fix it, try applying a wood conditioner before staining. This helps to even out the absorption rate of the wood.
  • Too Dark: If you accidentally apply too much stain, or if you leave it on for too long, the wood can become too dark. To fix it, try wiping the wood down with mineral spirits or paint thinner to remove some of the stain.
  • Brushstrokes: If you're using a brush to apply the stain, you might end up with noticeable brushstrokes. To avoid this, use a high-quality brush and apply the stain in thin, even coats, following the grain of the wood. You can also try using a rag to wipe off the excess stain, which helps to blend the brushstrokes.
  • Sticky Finish: A sticky finish often occurs when the topcoat is applied too thickly or when it doesn't dry properly. Ensure you apply thin, even coats and allow sufficient drying time between coats.

Remember, every project is a learning experience. Don't be afraid to experiment and try different techniques until you find what works best for you. And if you're feeling overwhelmed, don't hesitate to seek advice from other DIY-ers or professionals, or even browse online forums for tips and tricks.

Wondrous La Vie: Elevating Your Home Design Journey

Now, if all this DIY talk is making you think about bigger interior design projects, or if you're just looking for some inspiration, you should definitely check out Wondrous La Vie (wondrouslavie.com). It's like a treasure trove of interior design ideas and furniture inspiration.

Wondrous La Vie is Singapore's pioneering platform connecting homeowners with top interior designers and curated premium furniture brands. They've got everything from sofas and mattresses to living room sets and bedroom furniture. It's a great place to find that perfect piece to complement your newly stained side table Singapore.

One homeowner shared how connecting with the right designer via the platform turned their cramped HDB living room into a cozy family hangout—suddenly weekends feel so much better. Imagine that! That's the kind of transformation we're talking about.

And it's not just about the furniture. Wondrous La Vie also offers inspiration through real project showcases and style guides. You can see how other homeowners have transformed their spaces and get ideas for your own home. Plus, they make it easy to find matching designers or pieces. It's like having a personal interior design consultant at your fingertips.

They really understand that affordable luxury furniture Singapore is what people are looking for. You want quality, style, and comfort, without breaking the bank. And that "finally shiok to come home" feeling? Priceless.

So, whether you're tackling a small DIY project like staining a side table Singapore, or planning a full-blown kitchen renovation, Wondrous La Vie can help you every step of the way.

Why not hop over to wondrouslavie.com now? Take the quick quiz, browse sofas, mattresses, or connect with a designer and see what feels right for your space. You might just discover the missing piece that will transform your house into a home. Steady pom pi pi, confirm can!

Unlock Your Dream Cosy Haven Now: Start Your Side Table Project with Wondrous La Vie Lah!

Alright, let's create something *shiok* for our fellow Singaporean homeowners! Here's the HTML fragment to help them unlock their dream cosy haven, auntie-style:

So, you're thinking of tackling a DIY side table project, ah? Steady lah! That's a fantastic way to add a personal touch to your home, and honestly, it’s not as daunting as it seems. We all know how *sian* it can be coming home after a long day at the office and OT, only to be greeted by a space that doesn’t quite feel…right. But trust me, even small projects like a side table can make a big difference. It’s about creating a space that feels like a warm hug instead of more stress. Think of it as your personal recharge station, helping you unwind and face tomorrow’s grind with more energy. And that's where a little DIY magic and the right furniture come in!

Step-by-Step Guide to Staining Your DIY Side Table Evenly

Okay, let's get down to the nitty-gritty. You've built your side table (or maybe bought an unfinished one – no judgement!), and now it’s time to stain it. This is where the real transformation happens, but uneven staining can be a real headache. I’ve heard so many friends in the group chat complain about the same thing! Here’s how to get a professional-looking finish, even if you’re a beginner:

  1. Prep is Key, Lah! Sanding is your best friend. Start with a coarser grit sandpaper (around 120) to smooth out any imperfections, then move to a finer grit (around 220) for a super smooth surface. Remember to sand with the grain of the wood, not against it. Wipe away all the dust with a tack cloth – this is super important! Dust particles will ruin your stain job.
  2. Choose Your Stain Wisely: There are so many types of wood stain on the market, from oil-based to water-based. Water-based stains are generally easier to clean up (just soap and water!), but oil-based stains often provide a richer, more durable finish. Consider the type of wood you’re working with and the look you’re going for. Don't be afraid to test a small area first!
  3. Condition the Wood (Optional, But Recommended): Especially if you’re working with softwoods like pine, a wood conditioner will help the stain absorb more evenly. Softwoods tend to be blotchy, so this step is worth the extra effort.
  4. Apply the Stain: Use a good quality brush or a lint-free cloth. Apply the stain in long, even strokes, following the grain of the wood. Don’t glop it on! Apply a thin, even coat.
  5. Wipe Away the Excess: This is crucial! After a few minutes (check the stain manufacturer's instructions for the exact time), use a clean, lint-free cloth to wipe away any excess stain. This prevents the stain from becoming sticky and uneven. Wipe with the grain, using a light touch.
  6. Let It Dry (Patience is a Virtue!): Allow the stain to dry completely, according to the manufacturer's instructions. This could take several hours, or even overnight. Don’t rush it!
  7. Apply a Second Coat (If Needed): If you want a deeper, richer color, apply a second coat of stain. Repeat steps 4-6.
  8. Seal the Deal: Once the stain is completely dry, apply a clear topcoat (polyurethane or varnish) to protect the wood and give it a durable finish. Again, apply in thin, even coats, and let it dry completely between coats.

See? Not so hard, right? A little elbow grease and some patience, and you'll have a beautifully stained side table that you can be proud of. And that feeling of accomplishment? Confirm *shiok*!

Finding the Perfect Furniture to Complement Your DIY Side Table

Now that you’ve got your gorgeous, hand-stained side table, it’s time to find the perfect furniture to complement it. Think about the overall style you’re going for. Are you after a modern minimalist look? Or something more cosy and rustic? Finding the right pieces can really tie the whole room together, making it feel like a cohesive and inviting space. And that's where Wondrous La Vie can help *leh*!

Picture this: you open the door after work and your shoulders just drop – sounds like heaven? It can be *sia*. One homeowner shared how connecting with the right designer via the platform turned their cramped HDB living room into a cosy family hangout – suddenly weekends feel so much better. Wondrous La Vie is Singapore's pioneering interior design and home furnishing platform, beta launched in March 2024, connecting homeowners like you to top interior designers and curated premium furniture brands. They offer inspiration through real project showcases, style guides, and easy ways to find matching designers or pieces. It's all about affordable luxury and creating a home that you truly love. It's not just about furniture; it's about building a lifestyle.

Sofas That Say "Come, Rest Your Weary Bones"

After a long day at the office and that squeeze on the MRT home, there's nothing quite like sinking into a comfy sofa. A *cosy sofa Singapore* is essential for any living room, and Wondrous La Vie offers a fantastic selection of sofas in various styles and materials. Whether you’re looking for a plush, oversized sofa for movie nights or a sleek, modern sofa for entertaining guests, you’ll find something that suits your taste and budget. And let's be honest, a good sofa is an investment in your well-being! It's where you'll unwind, relax, and spend quality time with loved ones. Remember, *furniture* refers to movable or built-in objects (like *mattress*,*sofa*,cabinets,*tables and chairs* etc) designed to support human activities such as sitting, sleeping, eating, storing, and decorating living spaces, providing both practical function and aesthetic appeal in homes.

Mattresses That Give You That "Ahhh" Feeling

Let's talk about sleep. We all know how important it is, but so many of us struggle to get a good night's rest. Singaporeans are always on the lookout for intelligent ways to update their living spaces without breaking the bank, especially when HDB or condo renos can already eat up a big chunk of the household funds. Between rising costs and the need for a warmer, more practical home, many Singapore homeowners hold off for the perfect moment to refresh seating, sleep surfaces, or meal areas that actually make daily life feel better. That’s when jumping on furniture discounts becomes a total win—it lets you secure well-designed, durable items at real value reductions, often with extra benefits like no-delivery-fee, longer guarantees, or combo savings that make your money go further. All of a sudden you’re able to buy that dream couch on your wishlist or a comfort-focused sleep upgrade without the regret, turning your home into an truly welcoming retreat for bonding and rest after long workdays. Browsing sites such as Wondrous La Vie helps you stay updated on the latest offers, so you can compare, visualise, and grab the greatest value offers that perfectly suit your space and style.. A comfortable *mattress* is non-negotiable! If you're waking up with aches and pains, it's time for an upgrade. Wondrous La Vie offers a range of *best mattress for back pain Singapore*, from memory foam to latex to hybrid mattresses, ensuring you find the perfect fit for your body and sleeping style. Think about it: a good mattress isn't just about comfort; it's about investing in your health and productivity. Wake up feeling refreshed and ready to tackle the day – that's the goal!

Living Room Sets That Make You Want to Stay In

Creating a cohesive *living room* space can be tricky, but Wondrous La Vie makes it easy with their curated *living room* sets. These sets include everything you need to create a stylish and functional living room, from sofas and armchairs to coffee tables and side tables (yes, even ones to show off your DIY masterpiece!). Whether you prefer a *modern living room furniture Singapore* or a more traditional style, you'll find a set that reflects your personality and creates a welcoming atmosphere. A well-designed living room is the heart of the home, a place where you can relax, entertain, and connect with loved ones.

Bedroom Furniture for a Sanctuary of Sleep

Your *bedroom* should be a sanctuary, a place where you can escape the stresses of the day and recharge your batteries. Wondrous La Vie offers a wide selection of *bedroom furniture*, including beds, nightstands, dressers, and wardrobes, to help you create a peaceful and stylish retreat. From minimalist designs to luxurious upholstered beds, you'll find something that suits your taste and creates a calming atmosphere. And don't forget about storage! A well-organized bedroom is a stress-free bedroom. Consider adding storage solutions to keep clutter at bay and create a more serene environment. Let's make your *bedroom design Singapore* dreams come true!

Kitchen Solutions to Inspire Your Inner Chef

Even if you're not a master chef, a well-designed *kitchen* can make cooking a more enjoyable experience. Wondrous La Vie offers *kitchen renovation ideas Singapore* and solutions to help you create a functional and stylish kitchen, from cabinets and countertops to appliances and accessories. Whether you're looking for a complete kitchen makeover or just a few simple upgrades, you'll find inspiration and ideas to transform your kitchen into a culinary haven. Think about it: a well-designed kitchen isn't just about cooking; it's about creating a space where you can gather with family and friends, share meals, and create memories.

Turning Your House into a Home, One Side Table at a Time

It’s really *sian* when your bedroom feels cluttered and your mattress is giving you backache after work, but with the right *interior design* ideas and comfy pieces, that sense of calm comes back stronger. Remember, it's the small touches that make a big difference. Adding a personal touch to your home, like staining your own *side table Singapore*, can make a world of difference. It's about creating a space that reflects your personality and makes you feel happy and relaxed. And with Wondrous La Vie, finding the perfect *furniture* and connecting with the *best interior designers Singapore* is easier than ever. They focus on *affordable luxury furniture Singapore* and *high-end residential interior design in Singapore*, so you can create a home that you truly love, without breaking the bank.

Fun fact: A cosy, well-designed living room or bedroom can actually help you sleep better and feel less stressed after long workdays — small changes, big *shiok* difference!

So, why not pop over to wondrouslavie.com, take the quick quiz, browse *sofas*/ *mattresses*, or connect with a designer and see what feels right for your space? Explore *interior design* inspiration, browse *furniture* like *sofas*/ *mattresses*, connect with designers – it's all there waiting for you. Start small, dream big, and create a home that you can’t wait to come back to every day. Confirm can!

Check our other pages :

Frequently Asked Questions


Properly prepare the wood surface by sanding it smooth and removing any dust or debris.
Consider the type of wood, desired color, and whether you want a water-based or oil-based stain, keeping in mind the overall aesthetic youre aiming for.
Apply the stain in thin, even coats using a brush, cloth, or foam applicator, working with the wood grain and wiping off any excess stain promptly.
Typically, one or two coats are sufficient for most stains, but follow the manufacturers instructions and test on a hidden area first to achieve the desired color intensity.
Allow the stain to dry completely according to the manufacturers instructions, usually 24-48 hours, before applying a protective finish like varnish or polyurethane.